

Introduction
If you have a website, you probably want to see how users are interacting with it and where they are coming from. Google Analytics is the best way to keep a track of that.
Setting up Google Analytics from scratch on your Webflow site might sound tricky, but it's actually pretty straightforward once you know what to do. And that’s exactly what we’ll show you today!
In this guide, we'll walk you through the entire process of setting up Google Analytics on your Webflow site. We'll start with the basics, like creating your Google Analytics account and integrating it with Webflow. Then we'll get into the good stuff—tracking key metrics and setting up custom events to get deeper data.
By the end of this blog, you would have set Google Analytics and Google Tag Manager on your website along with metrics that you care about as a business.
Ready? Let’s begin!
Setting Up Google Analytics in Webflow
Alright, let's get into the specifics of setting up Google Analytics on your Webflow site. We’ll break it down into two main parts: creating your Google Analytics account and integrating it with Webflow.
Creating a Google Analytics Account & Integrating with Webflow.
First things first, you need to have a Google Analytics account. If you already have one, great! If not, follow these steps to create one:
1. Sign Up for Google Analytics
- Head over to Google Analytics, and click on ‘Start measuring’.

- Fill out the details like your business name, details, objective etc.

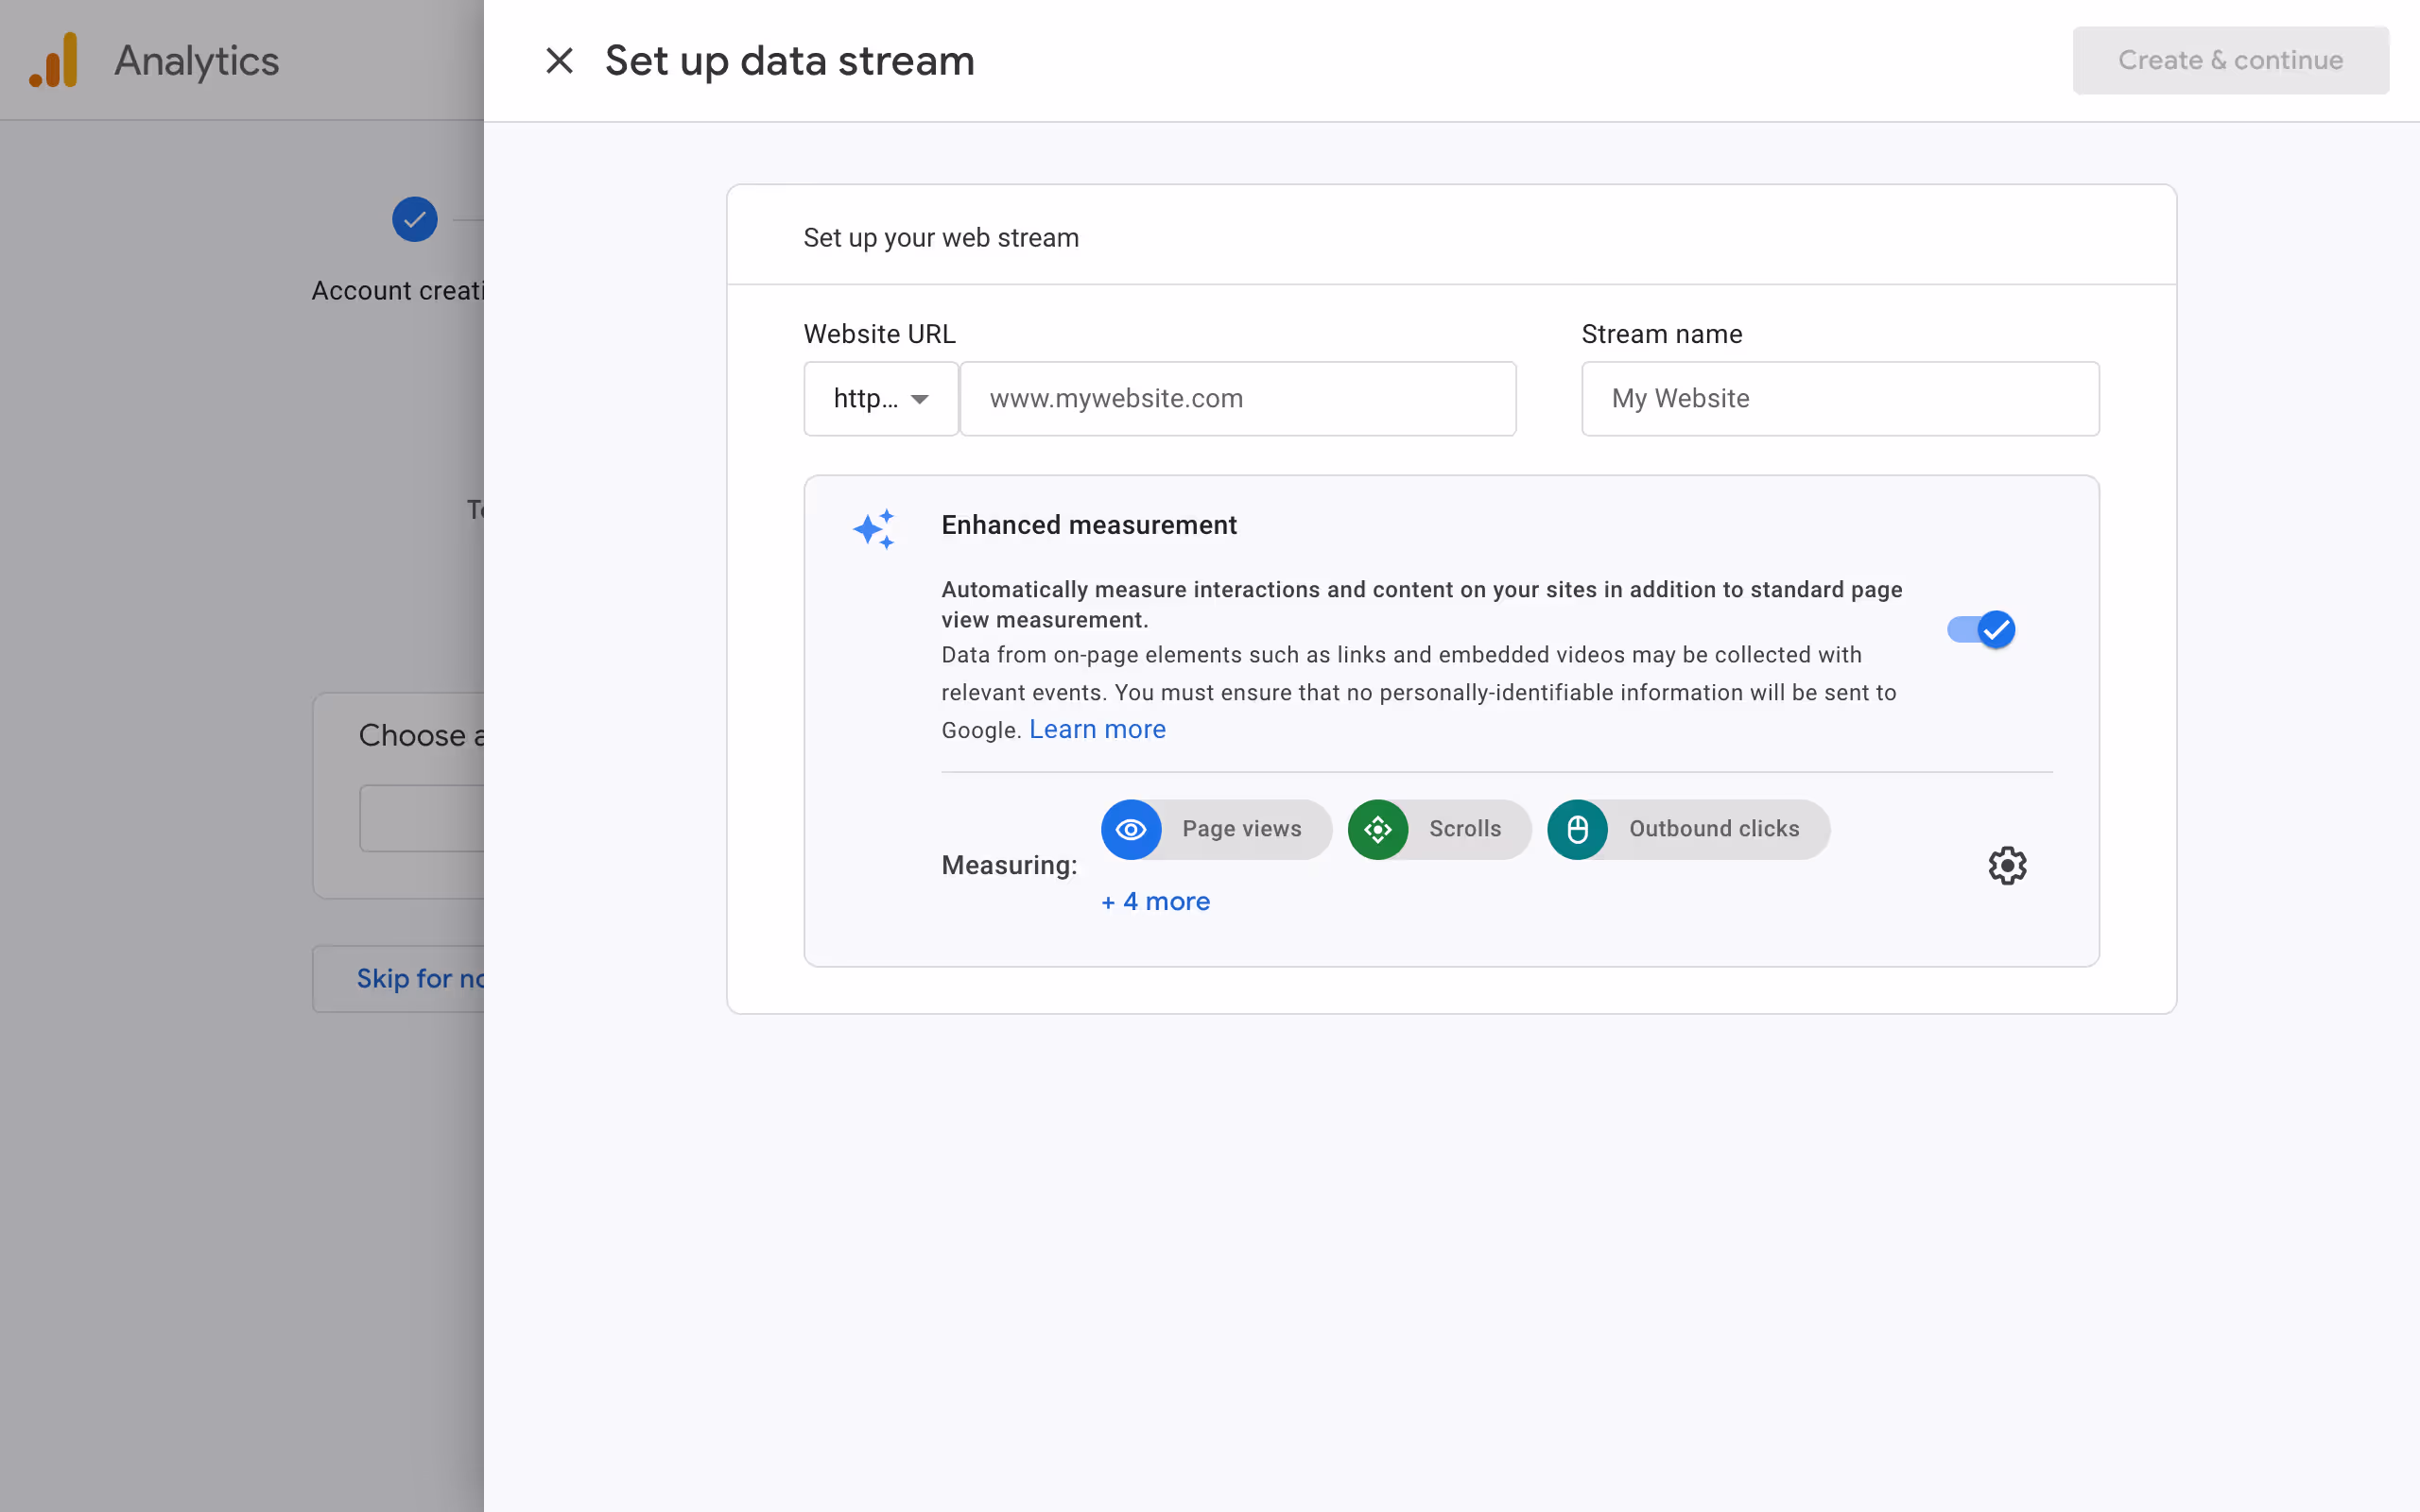
- Once you reach the ‘data collection’ stage, choose ‘Web’ from the options.
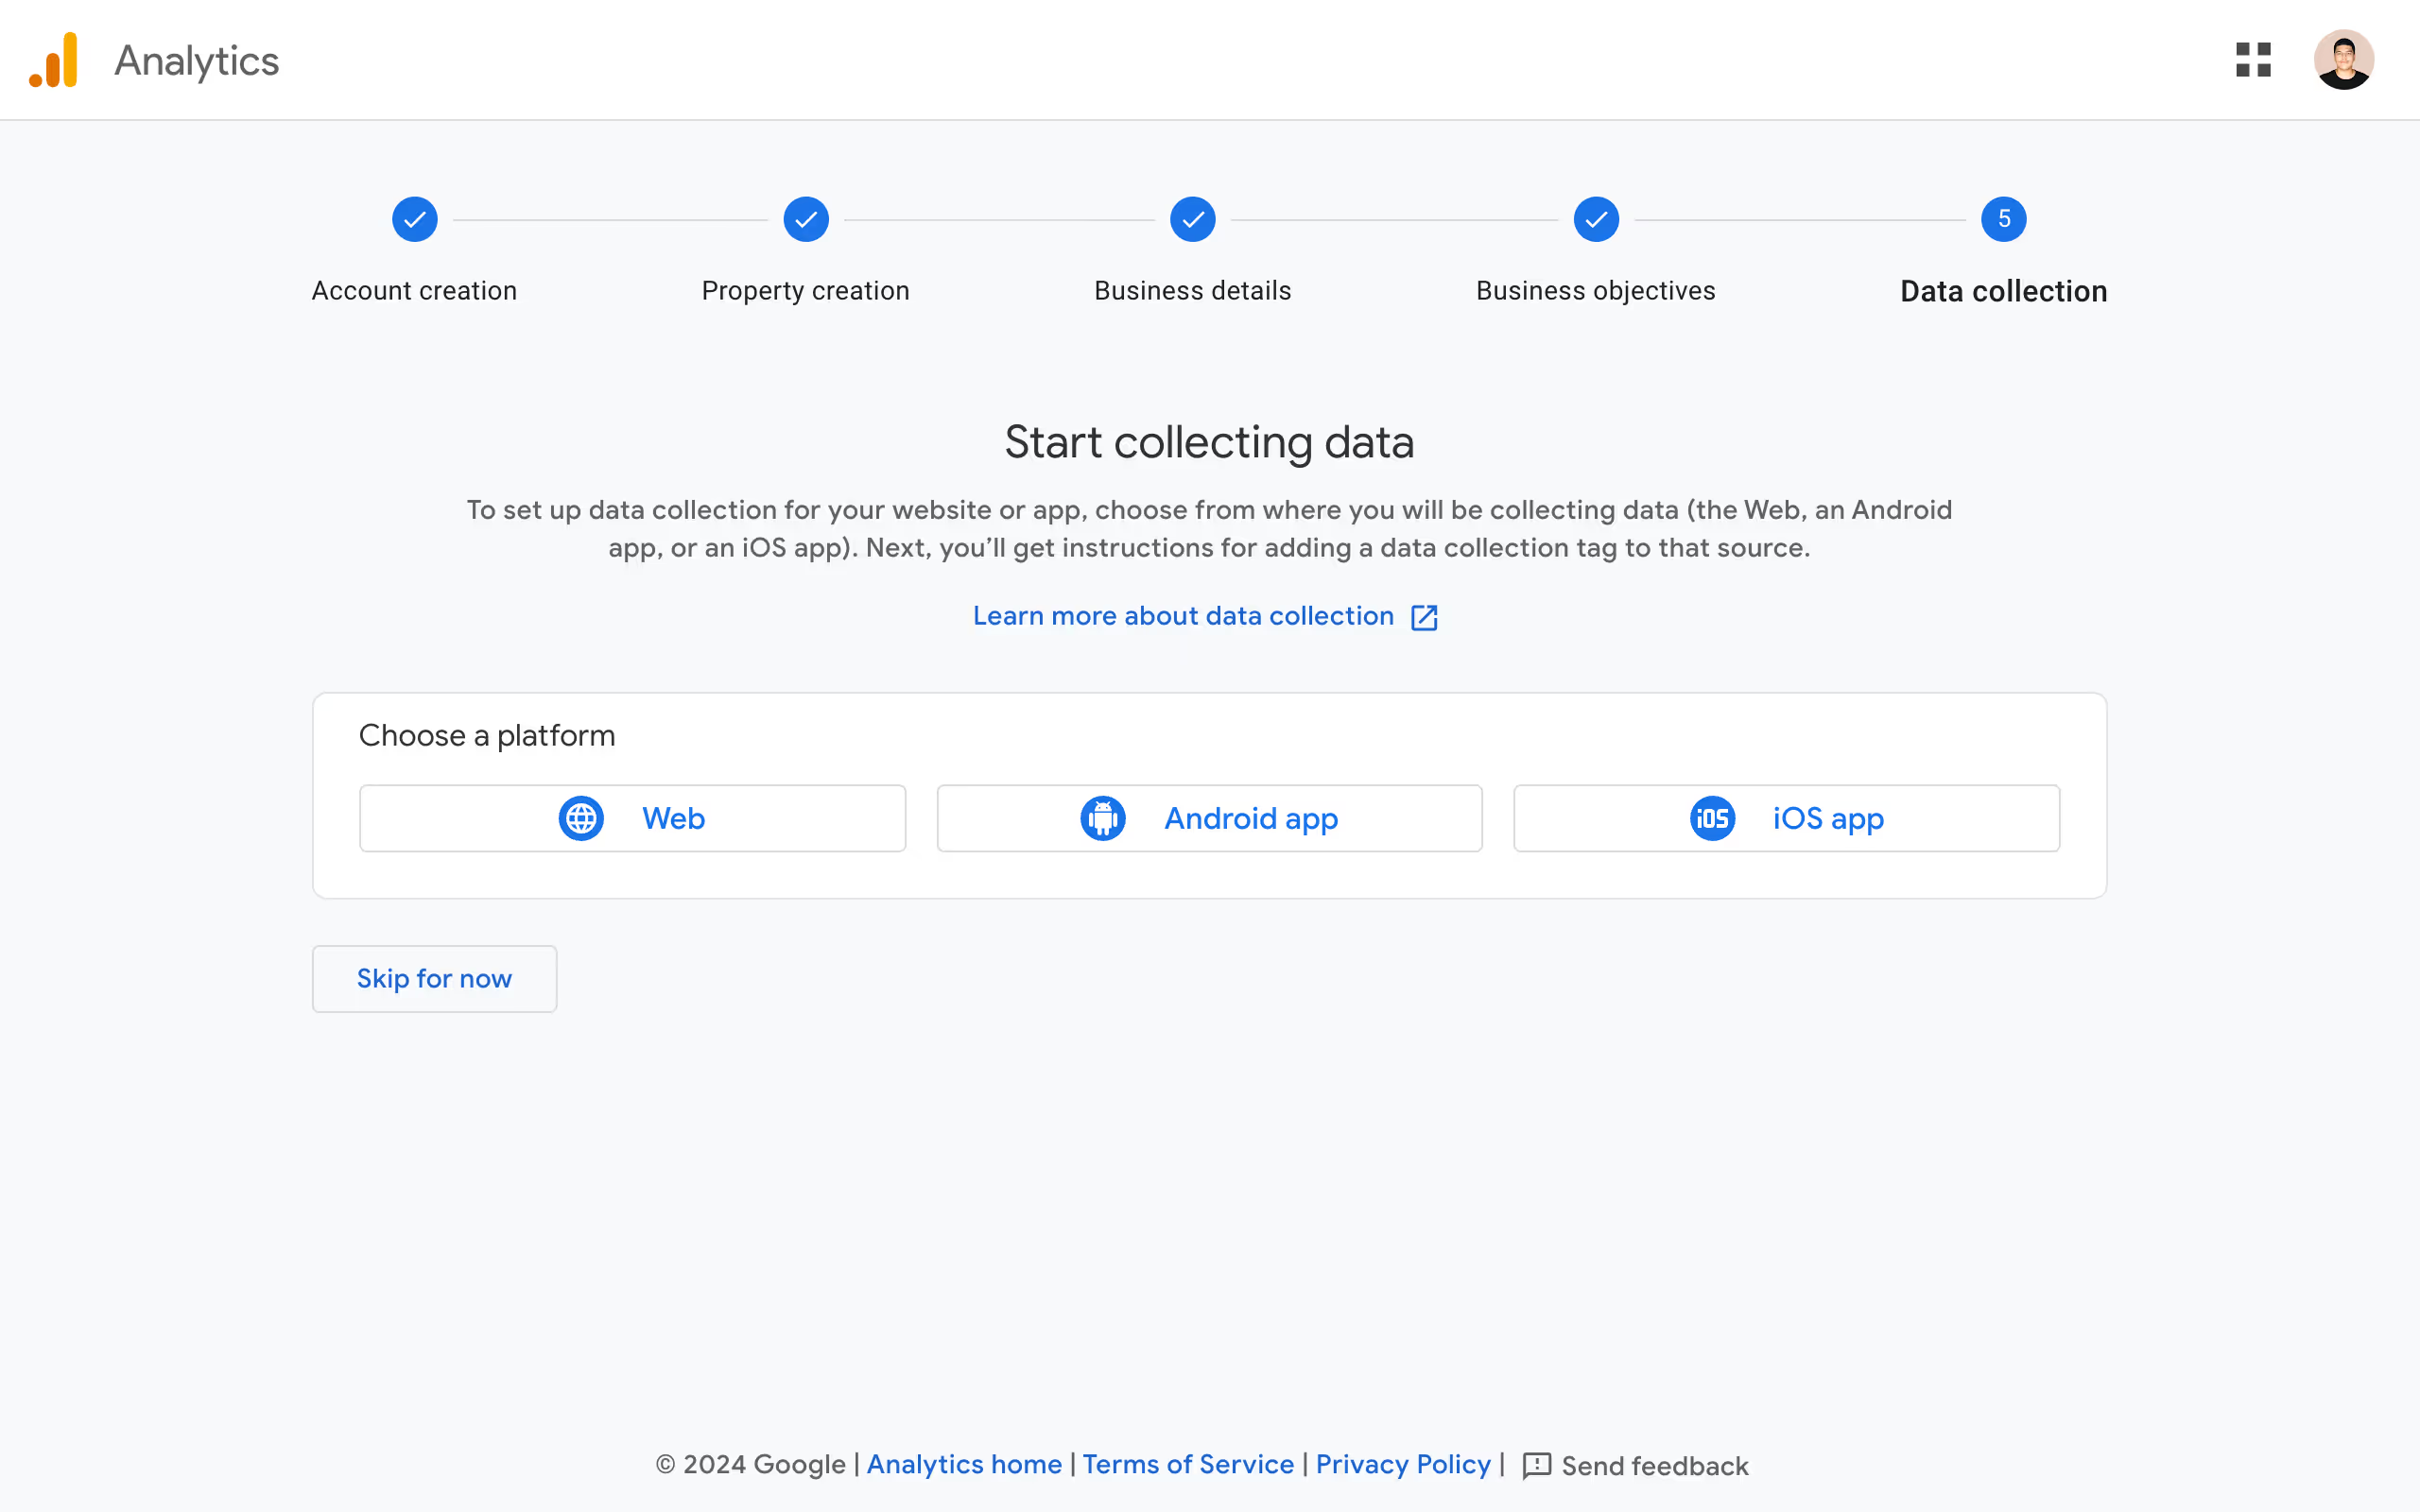
- Add your website URL, and hit ‘Create & continue’.
2. Install Google tag on Webflow
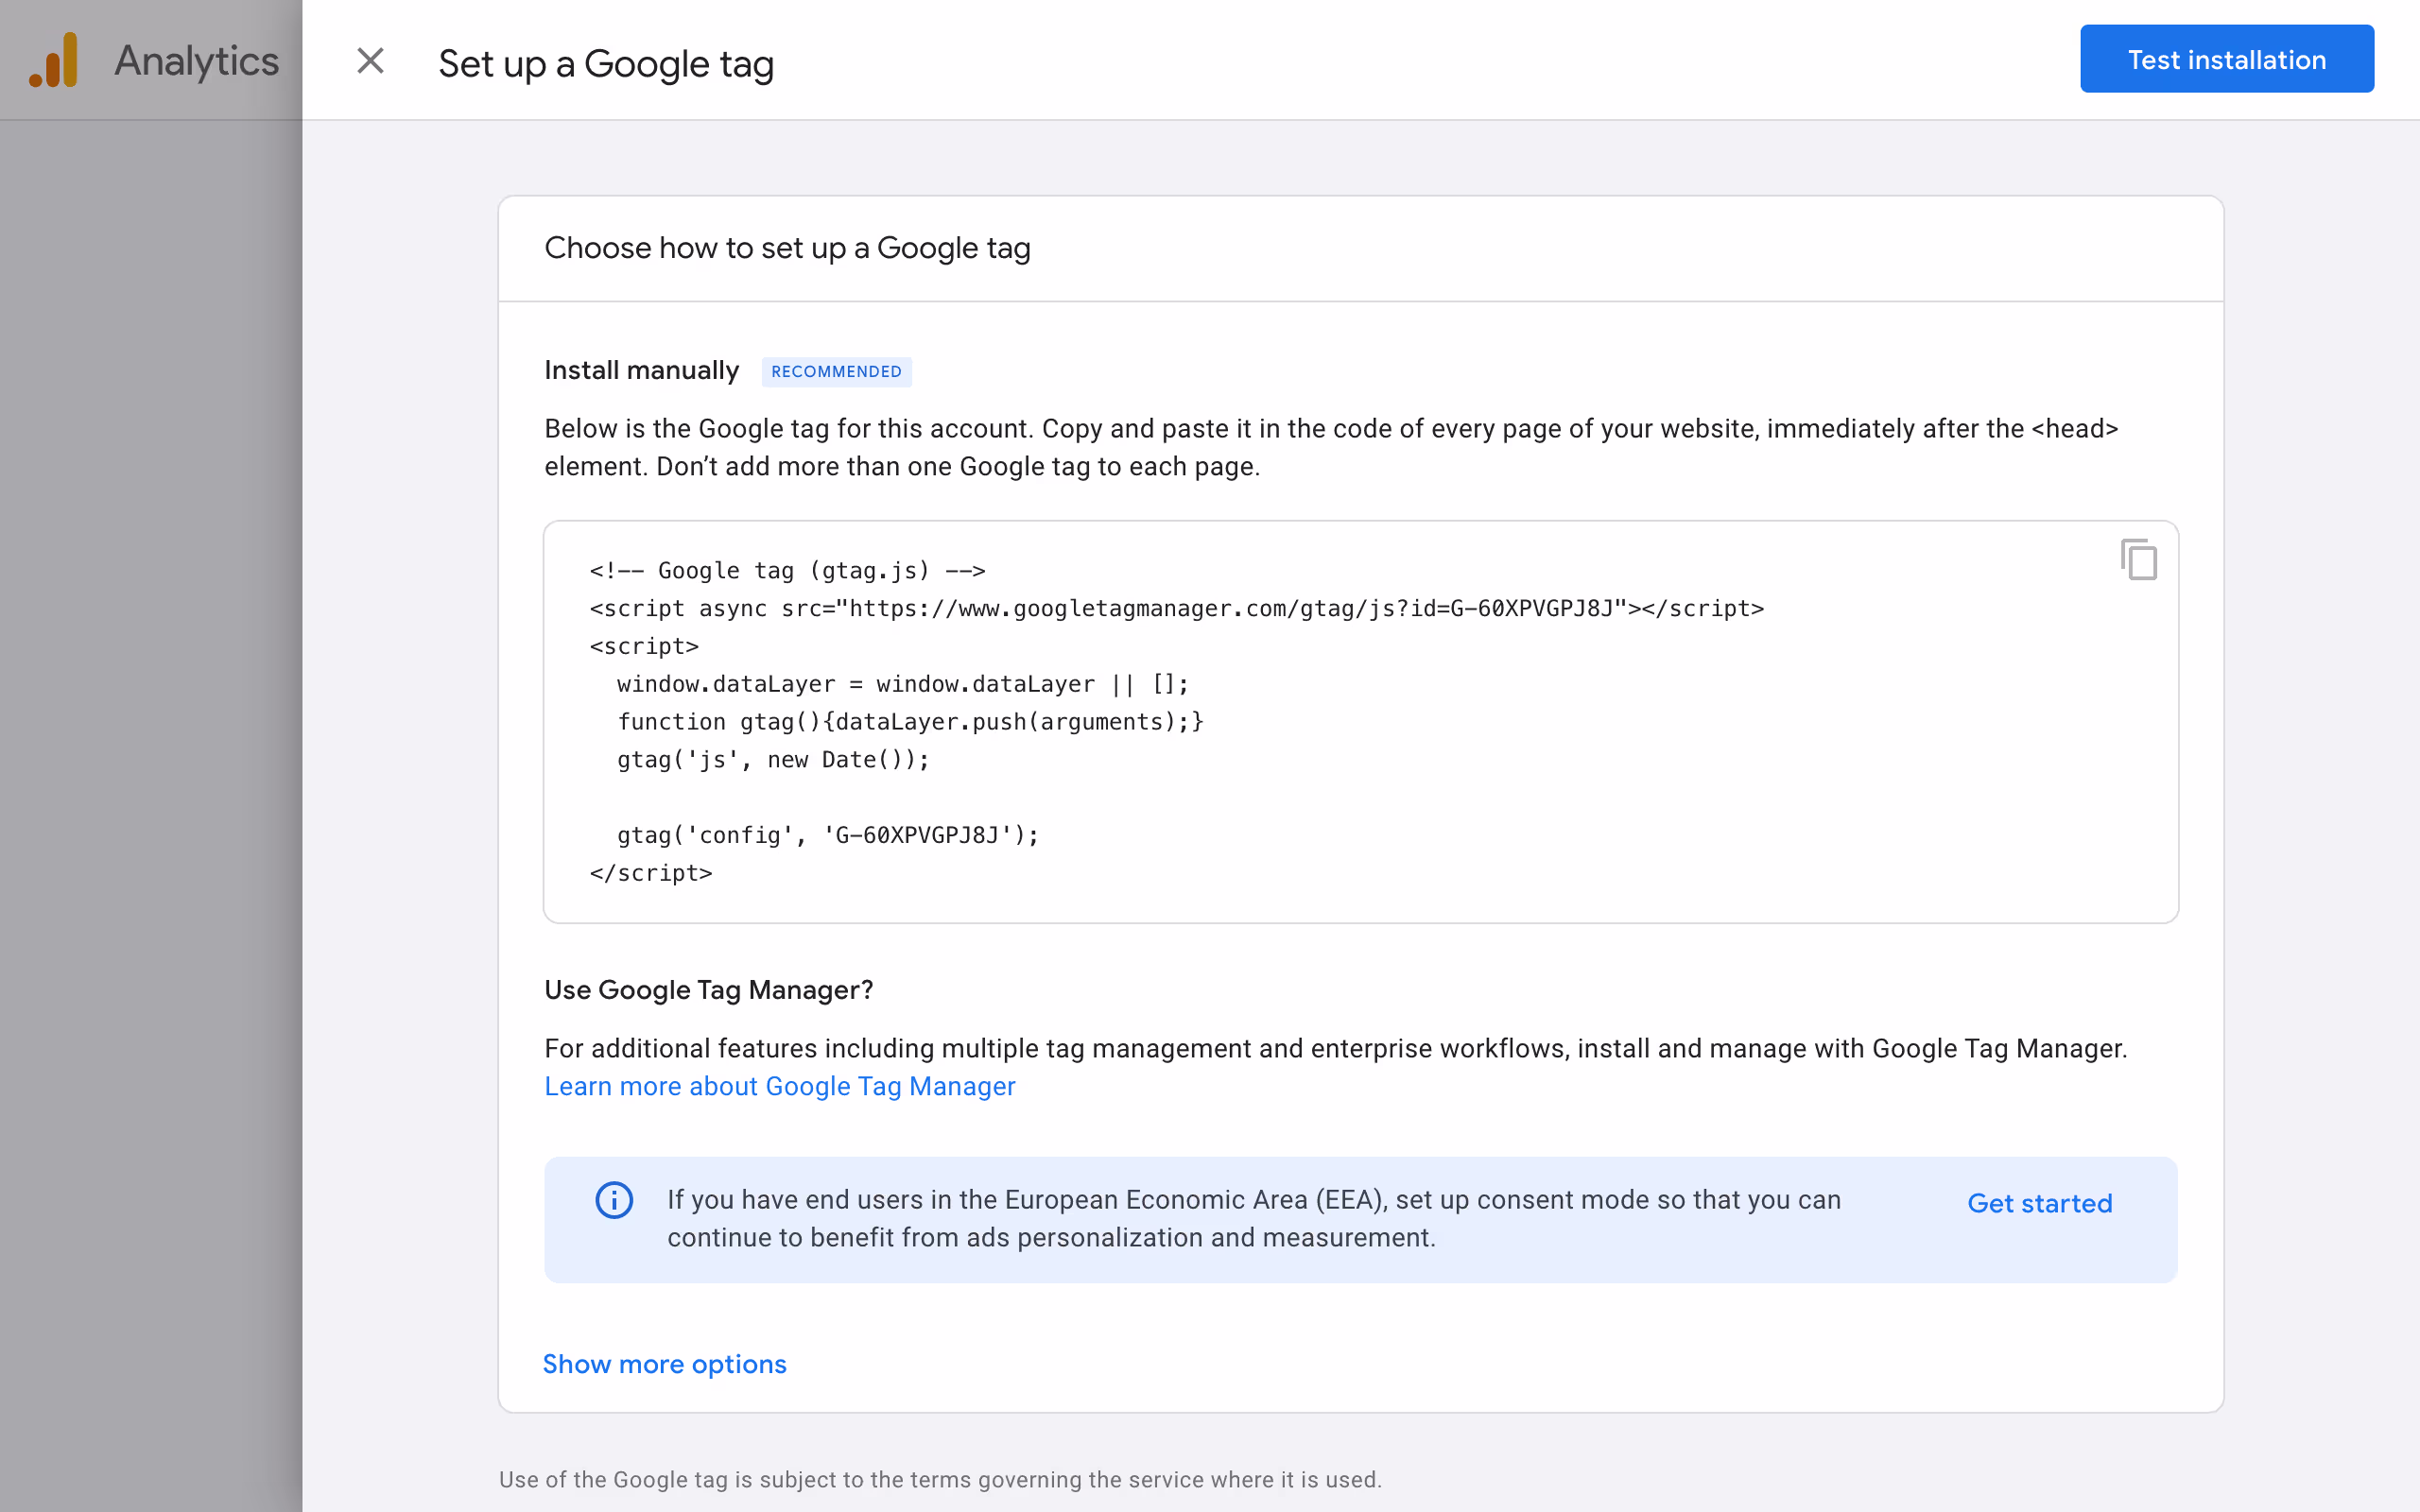
- Once you add your website, you’ll get a code snippet to install Google tag on your website. Copy the code, and head over to your Webflow website’s settings.
- Paste the snippet under the ‘head code’ in the custom code tab.
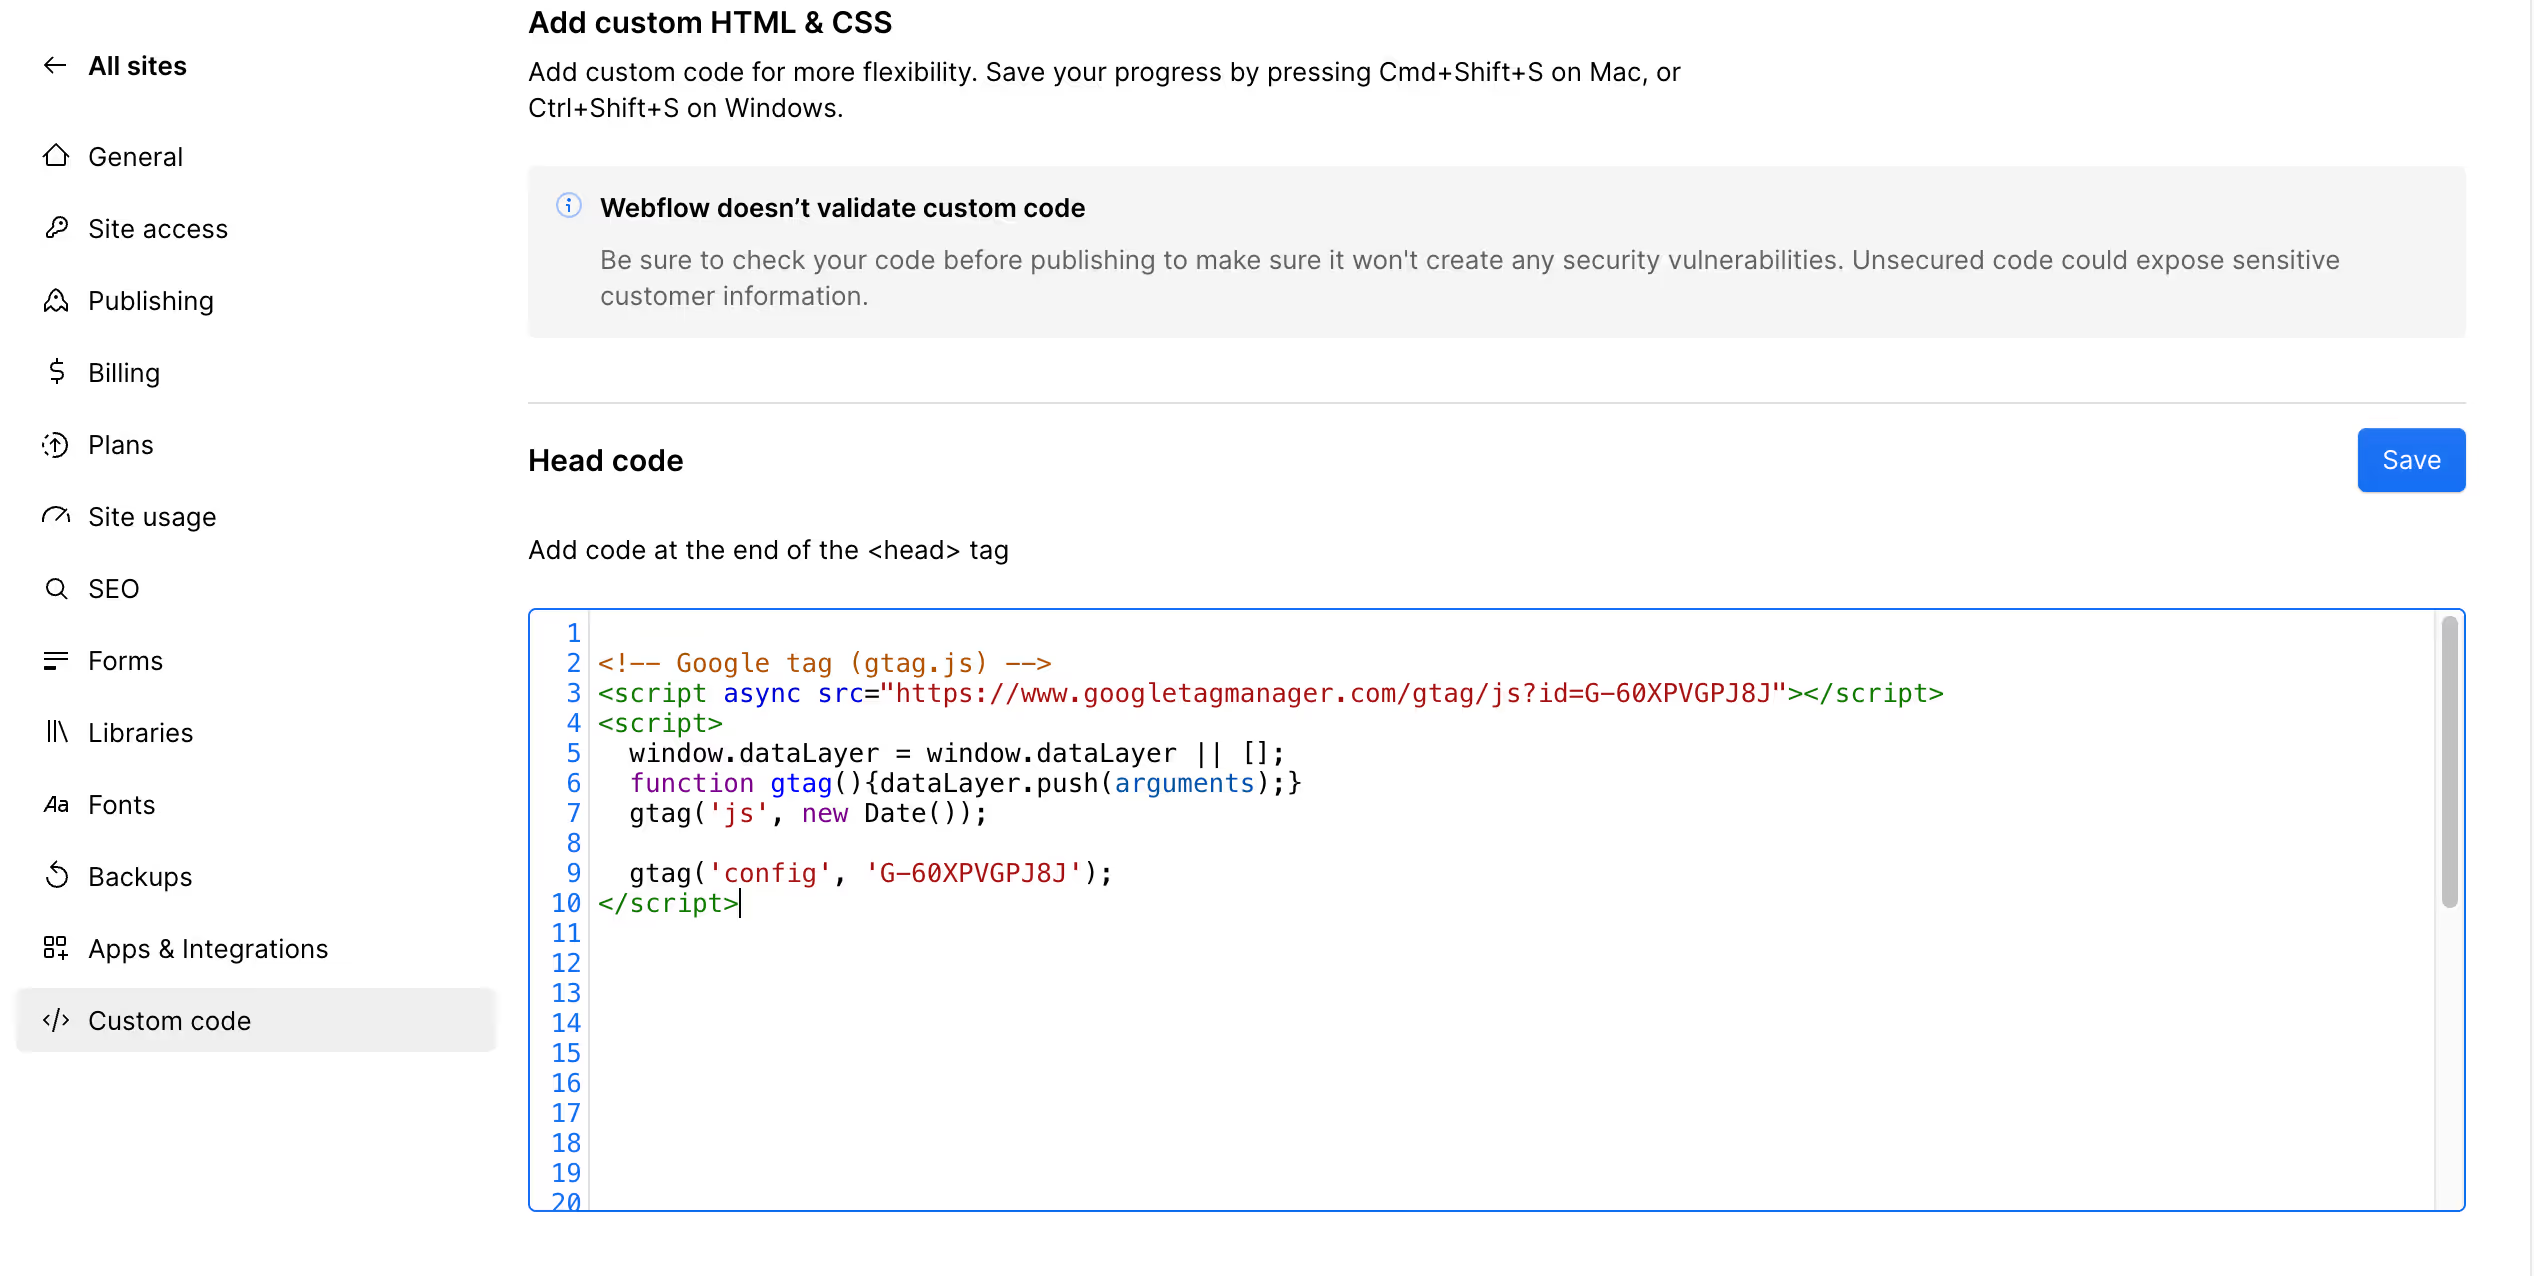
- Once done, publish your website, go back to Google Analytics, and click on ‘Test installation’. Your Google tag should now be connected to your website.
(Note: It might take up to 24 hours for you to see data in your analytics account)

Tracking Metrics with Google Analytics
Now that you've got Google Analytics set up on your Webflow site, it's time to understand your data and start tracking some key metrics. These metrics will help you understand how visitors interact with your site and where you can make improvements.
But first, let us show you some of the metrics you should track, and why they might be helpful. Most of these will already be taken care of just by setting up analytics on your website, but you should still know what they are.
Basic Metrics to Track
These are the most common metrics any website owner needs to look at to get a sense of where and who their users are, and how they interact with your website.
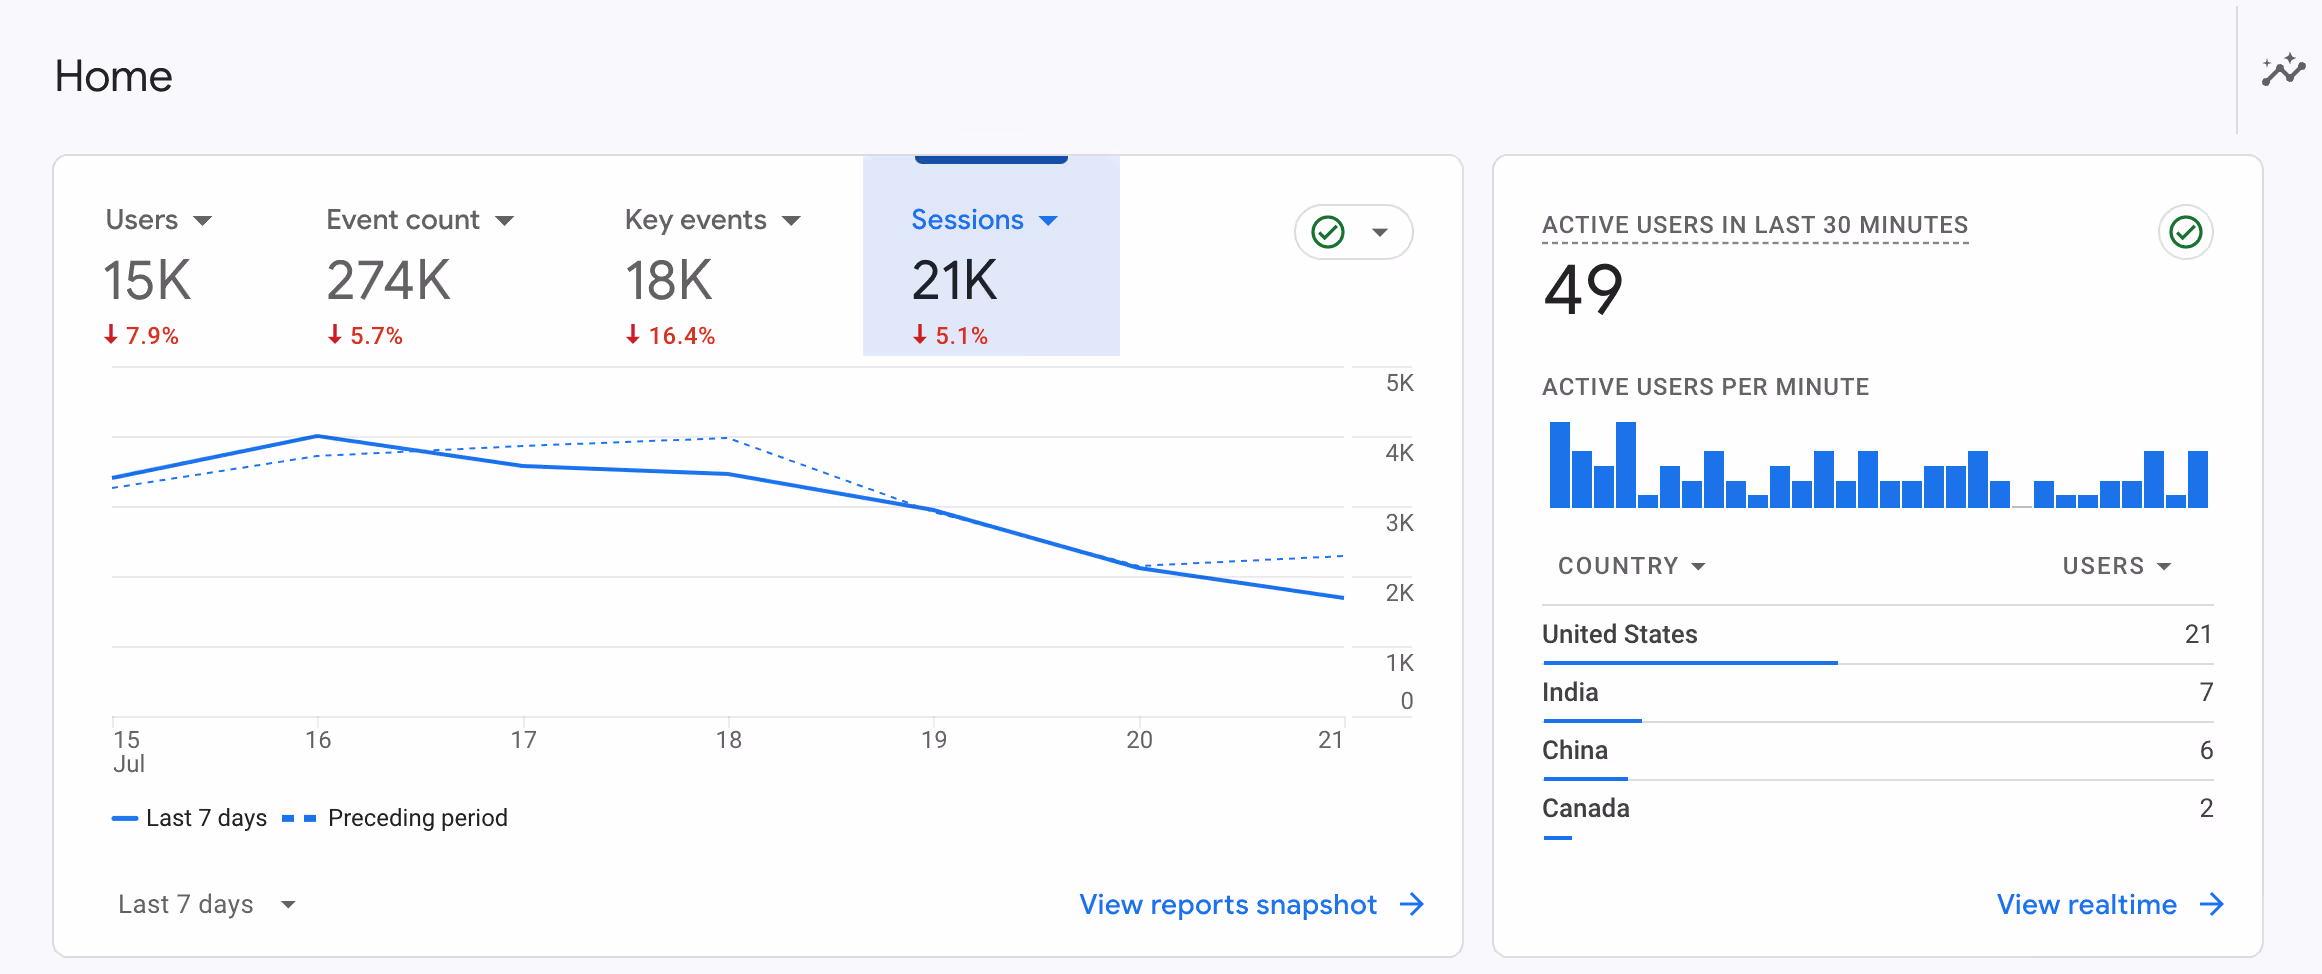
1. Users and Sessions
- Users: This metric tells you how many unique visitors have come to your site. Each user is counted once, even if they visit multiple times.
- Sessions: This refers to the total number of visits to your site. One user can have multiple sessions.
These metrics give you a high-level overview of your website's traffic.
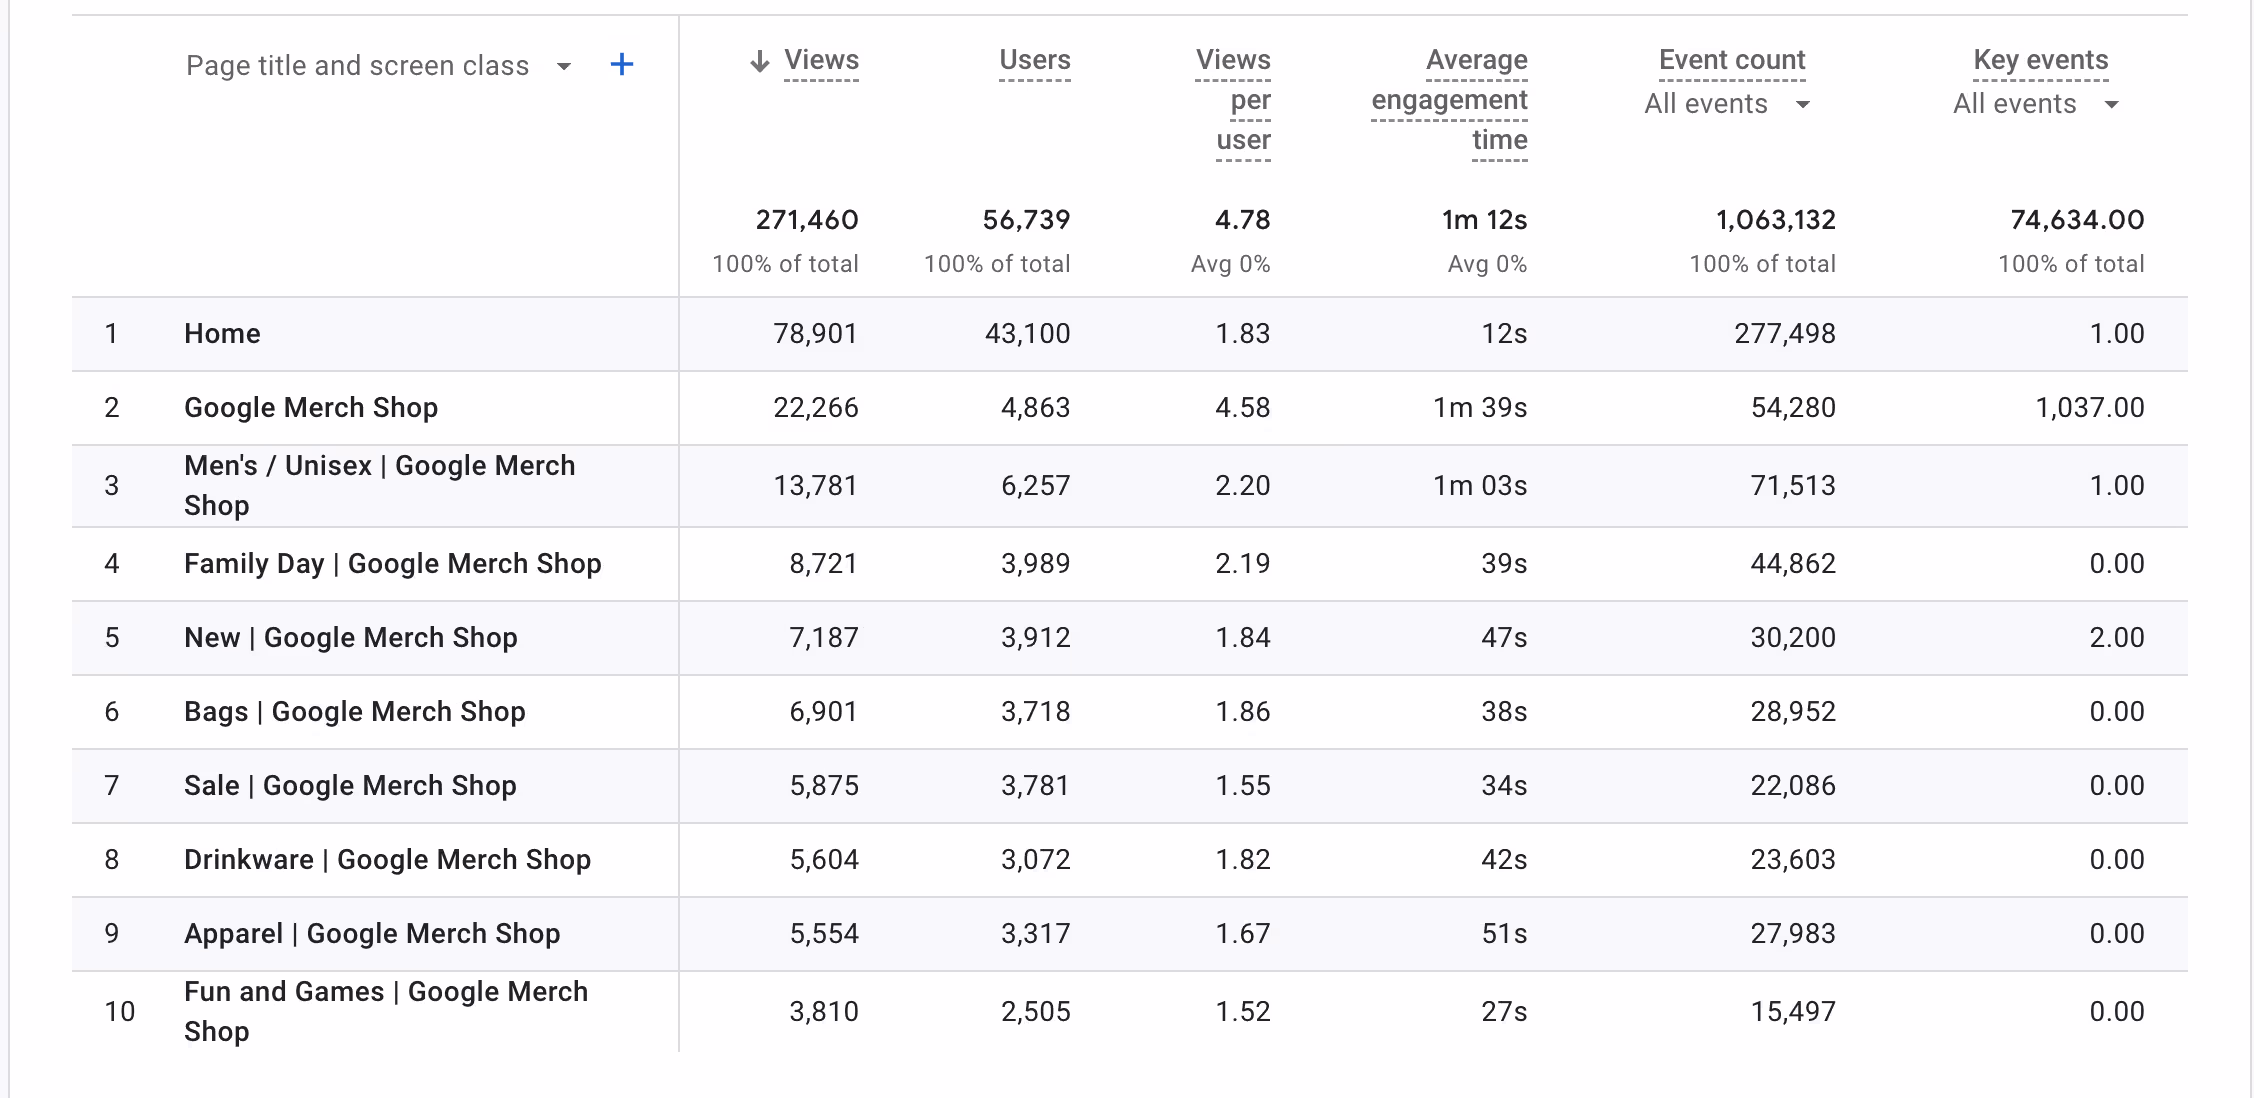
2. Page Views
- This metric shows the total number of pages viewed on your site. It includes repeated views of a single page.
- This helps you identify your most popular content and understand how users navigate your site.
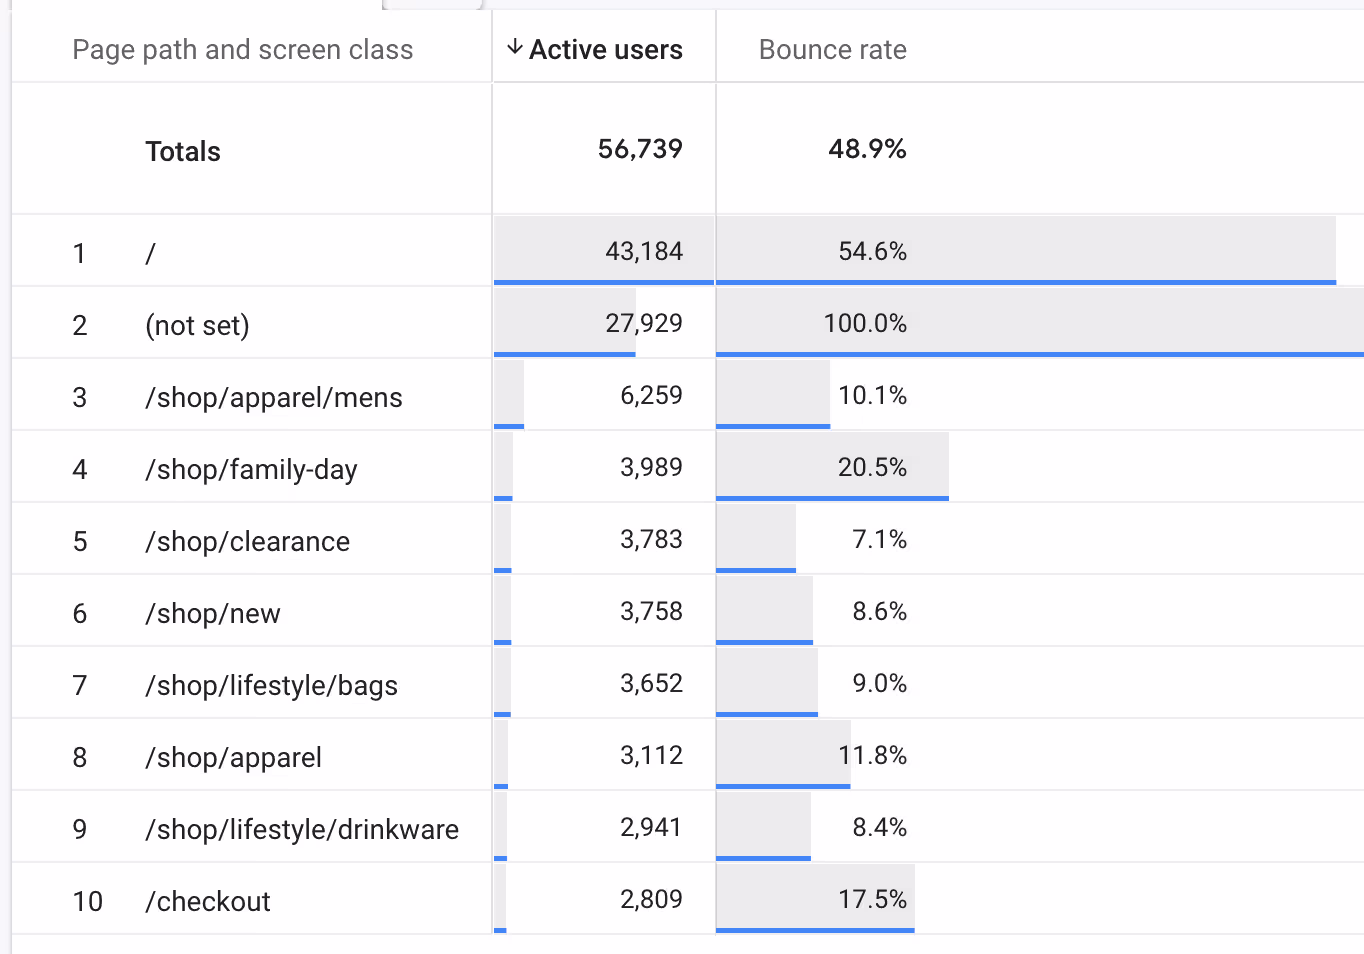
3. Bounce Rate
- The percentage of visitors who leave your site after viewing only one page.
- A high bounce rate could indicate that your site isn’t engaging enough or that visitors aren't finding what they’re looking for.
4. Average Session Duration
- This metric tells you how long visitors typically stay on your site during a single session.
- Longer sessions usually indicate that users find your content valuable and engaging.

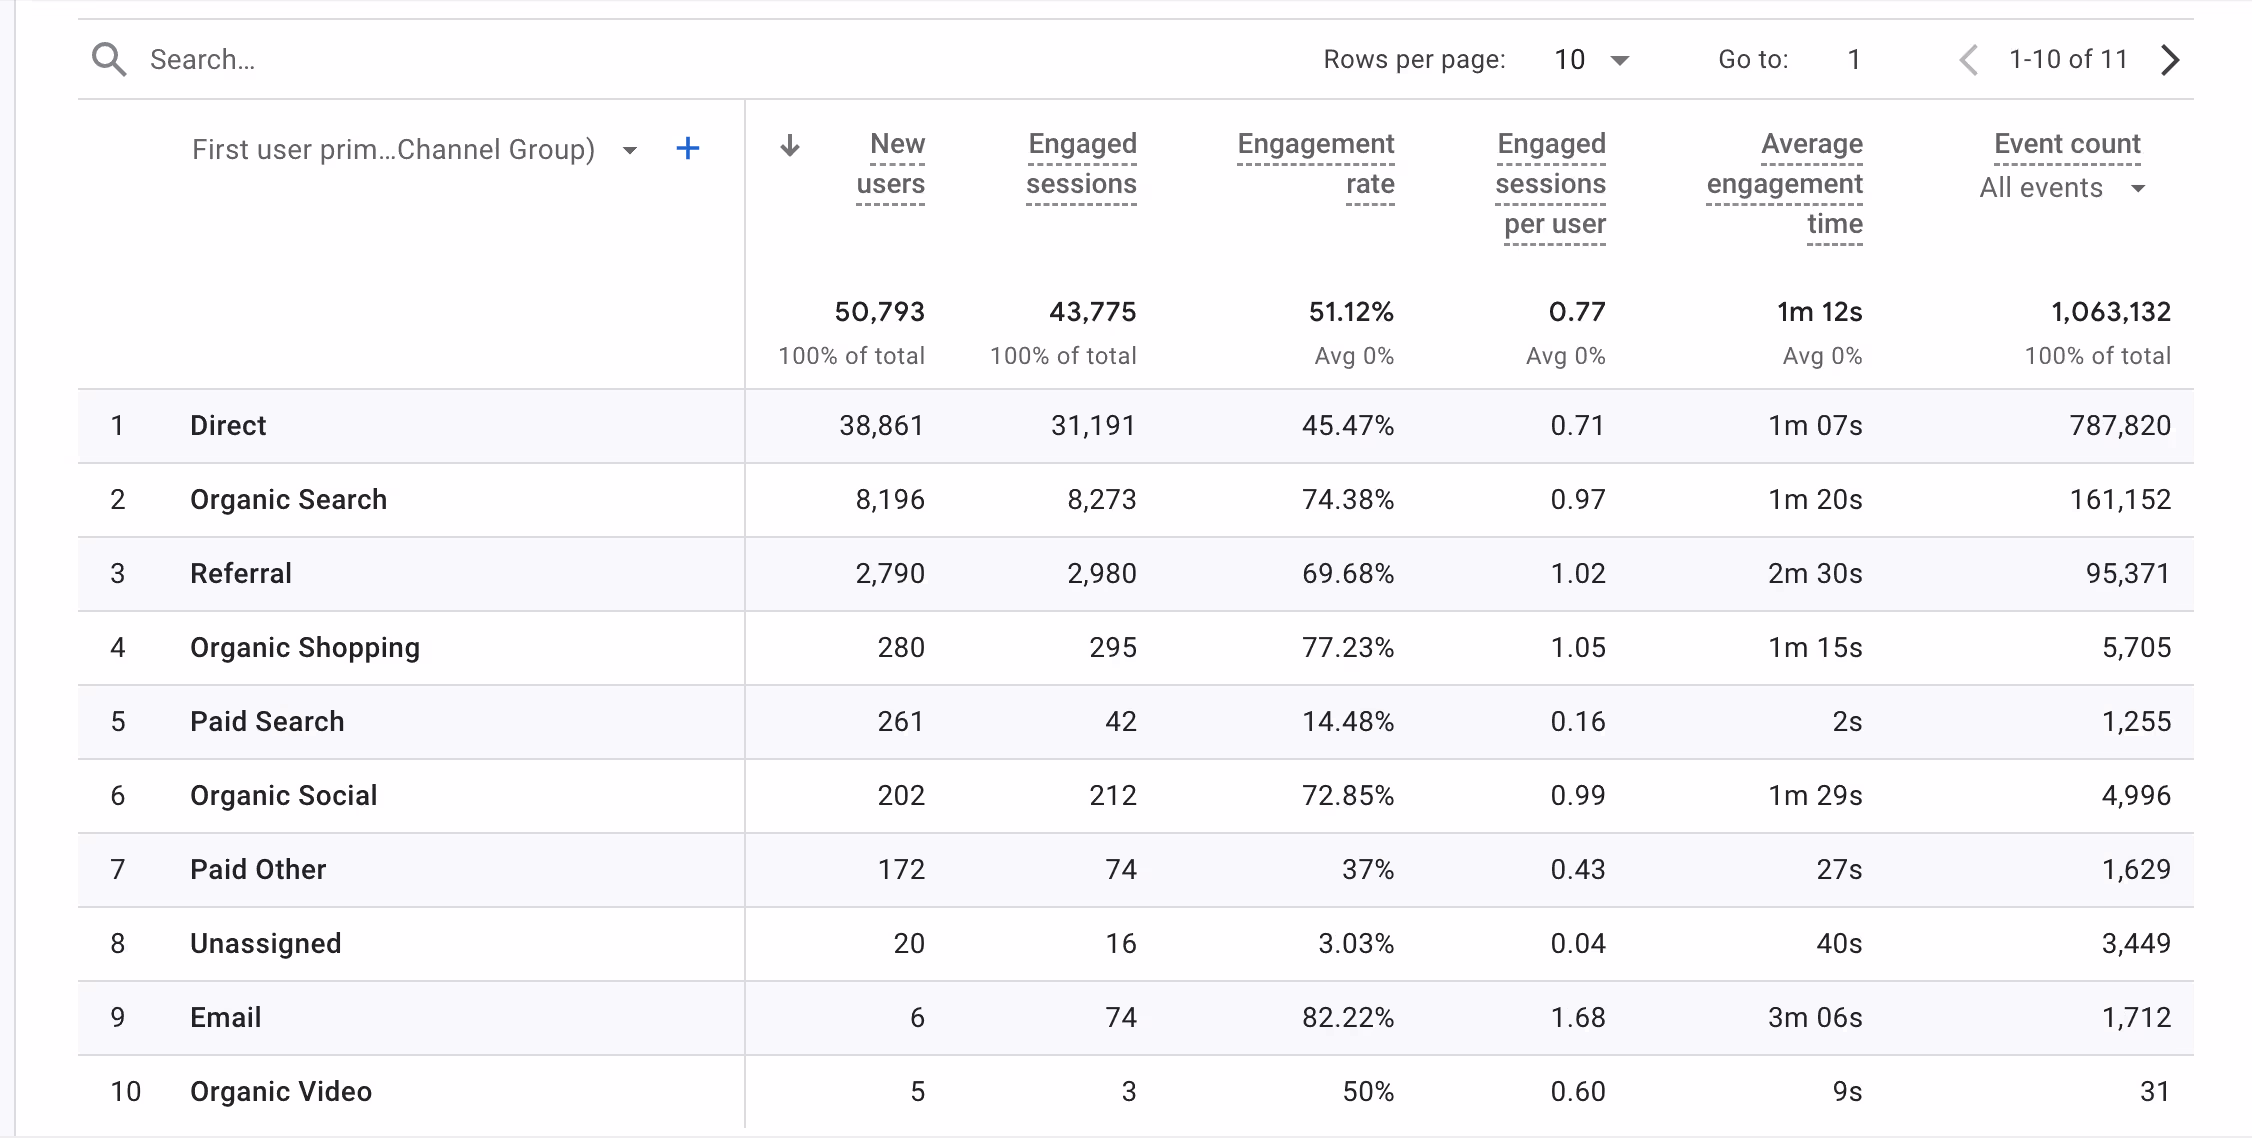
5. Traffic Sources
- Shows where your visitors are coming from (e.g., search engines, social media, direct visits).
- Helps you understand which marketing channels are most effective in driving traffic to your site.
Advanced Metrics
1. Conversion Tracking
- Goals: Set up goals in Google Analytics to track specific actions you want visitors to take, like signing up for a newsletter, completing a purchase, or filling out a contact form.
- E-commerce Tracking: If you have an online store, e-commerce tracking will help you monitor sales, revenue, and product performance.

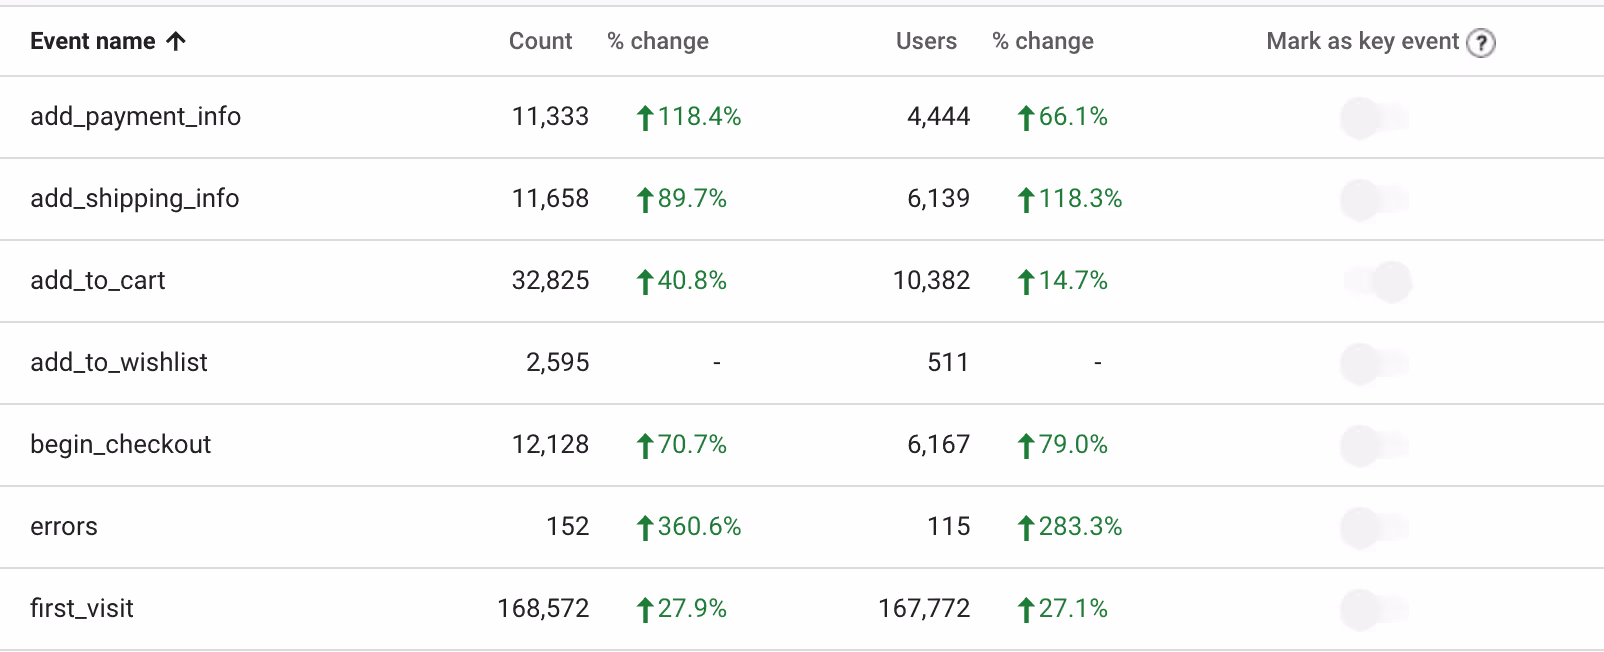
2. Event Tracking
- Events are user interactions with content that can be tracked independently from a web page or a screen load. Examples include downloads, mobile ad clicks, video plays, and button clicks.
- Setting Up Events: You can set up events using Google Tag Manager. For instance, track button clicks by creating a new tag and trigger in GTM, specifying the button’s CSS selector.
What can you use this data for
- Analyzing audience demographics and behavior - Google Analytics provides insights into your audience's age, gender, interests, and geographic location. You can use this information to tailor your content and marketing strategies to better meet the needs of your audience.
- Identifying High-Performing Content - You can look at the Page Views and Average Session Duration metrics to find out which pages are most popular and engaging. You can then use this data to create more of the content that your audience loves.
- Understanding User Flow - The User Flow report shows the path users take through your site, from where they enter to where they exit. This helps you identify potential roadblocks and optimize the user journey.
If you just want to track these basic metrics, setting up the Google Analytics should be enough for you. But if you want to track specific metrics like button clicks, form submissions etc, we’ll need to have a little different set up. Let’s have a look at how to do that -
Taking Your Tracking to the Next Level with Custom Events
While pre-set metrics of Google Analytics provide a lot of information about your website's overall performance, you can go a step ahead to get even deeper insights by setting up custom events. Custom events allow you to track specific interactions on your site, such as button clicks, form submissions, video plays, and e-commerce transactions. This detailed data helps you understand exactly how users engage with your site's elements and which actions lead to conversions.
To properly manage and implement these custom events, we use Google Tag Manager (GTM). Let’s see what GTM is, and how you can use it to set custom events.
Introduction to Google Tag Manager (GTM)
Google Tag Manager is a free tool that makes it easy to manage and deploy marketing tags (like the Google Analytics tracking code or Facebook pixel) on your website without having to modify the code directly. GTM offers a user-friendly interface where you can add and update tags, set up triggers, and define variables—all without touching your website’s code.
Why use GTM:
- Simplifies Tag Management: Once you’ve added the GTM code, you can add, edit, and disable tags without touching the website code again.
- Reduces Errors: This also decreases the chances of errors by centralizing your tag management.
- Speeds Up Implementation: With GTM set up on your website, you can quickly deploy new tags and updates.
- Consolidates Tracking: The best feature of GTM is that you can manage all your tracking codes in one place, including Google Analytics, Google Ads, and third-party tags.
Setting Up GTM
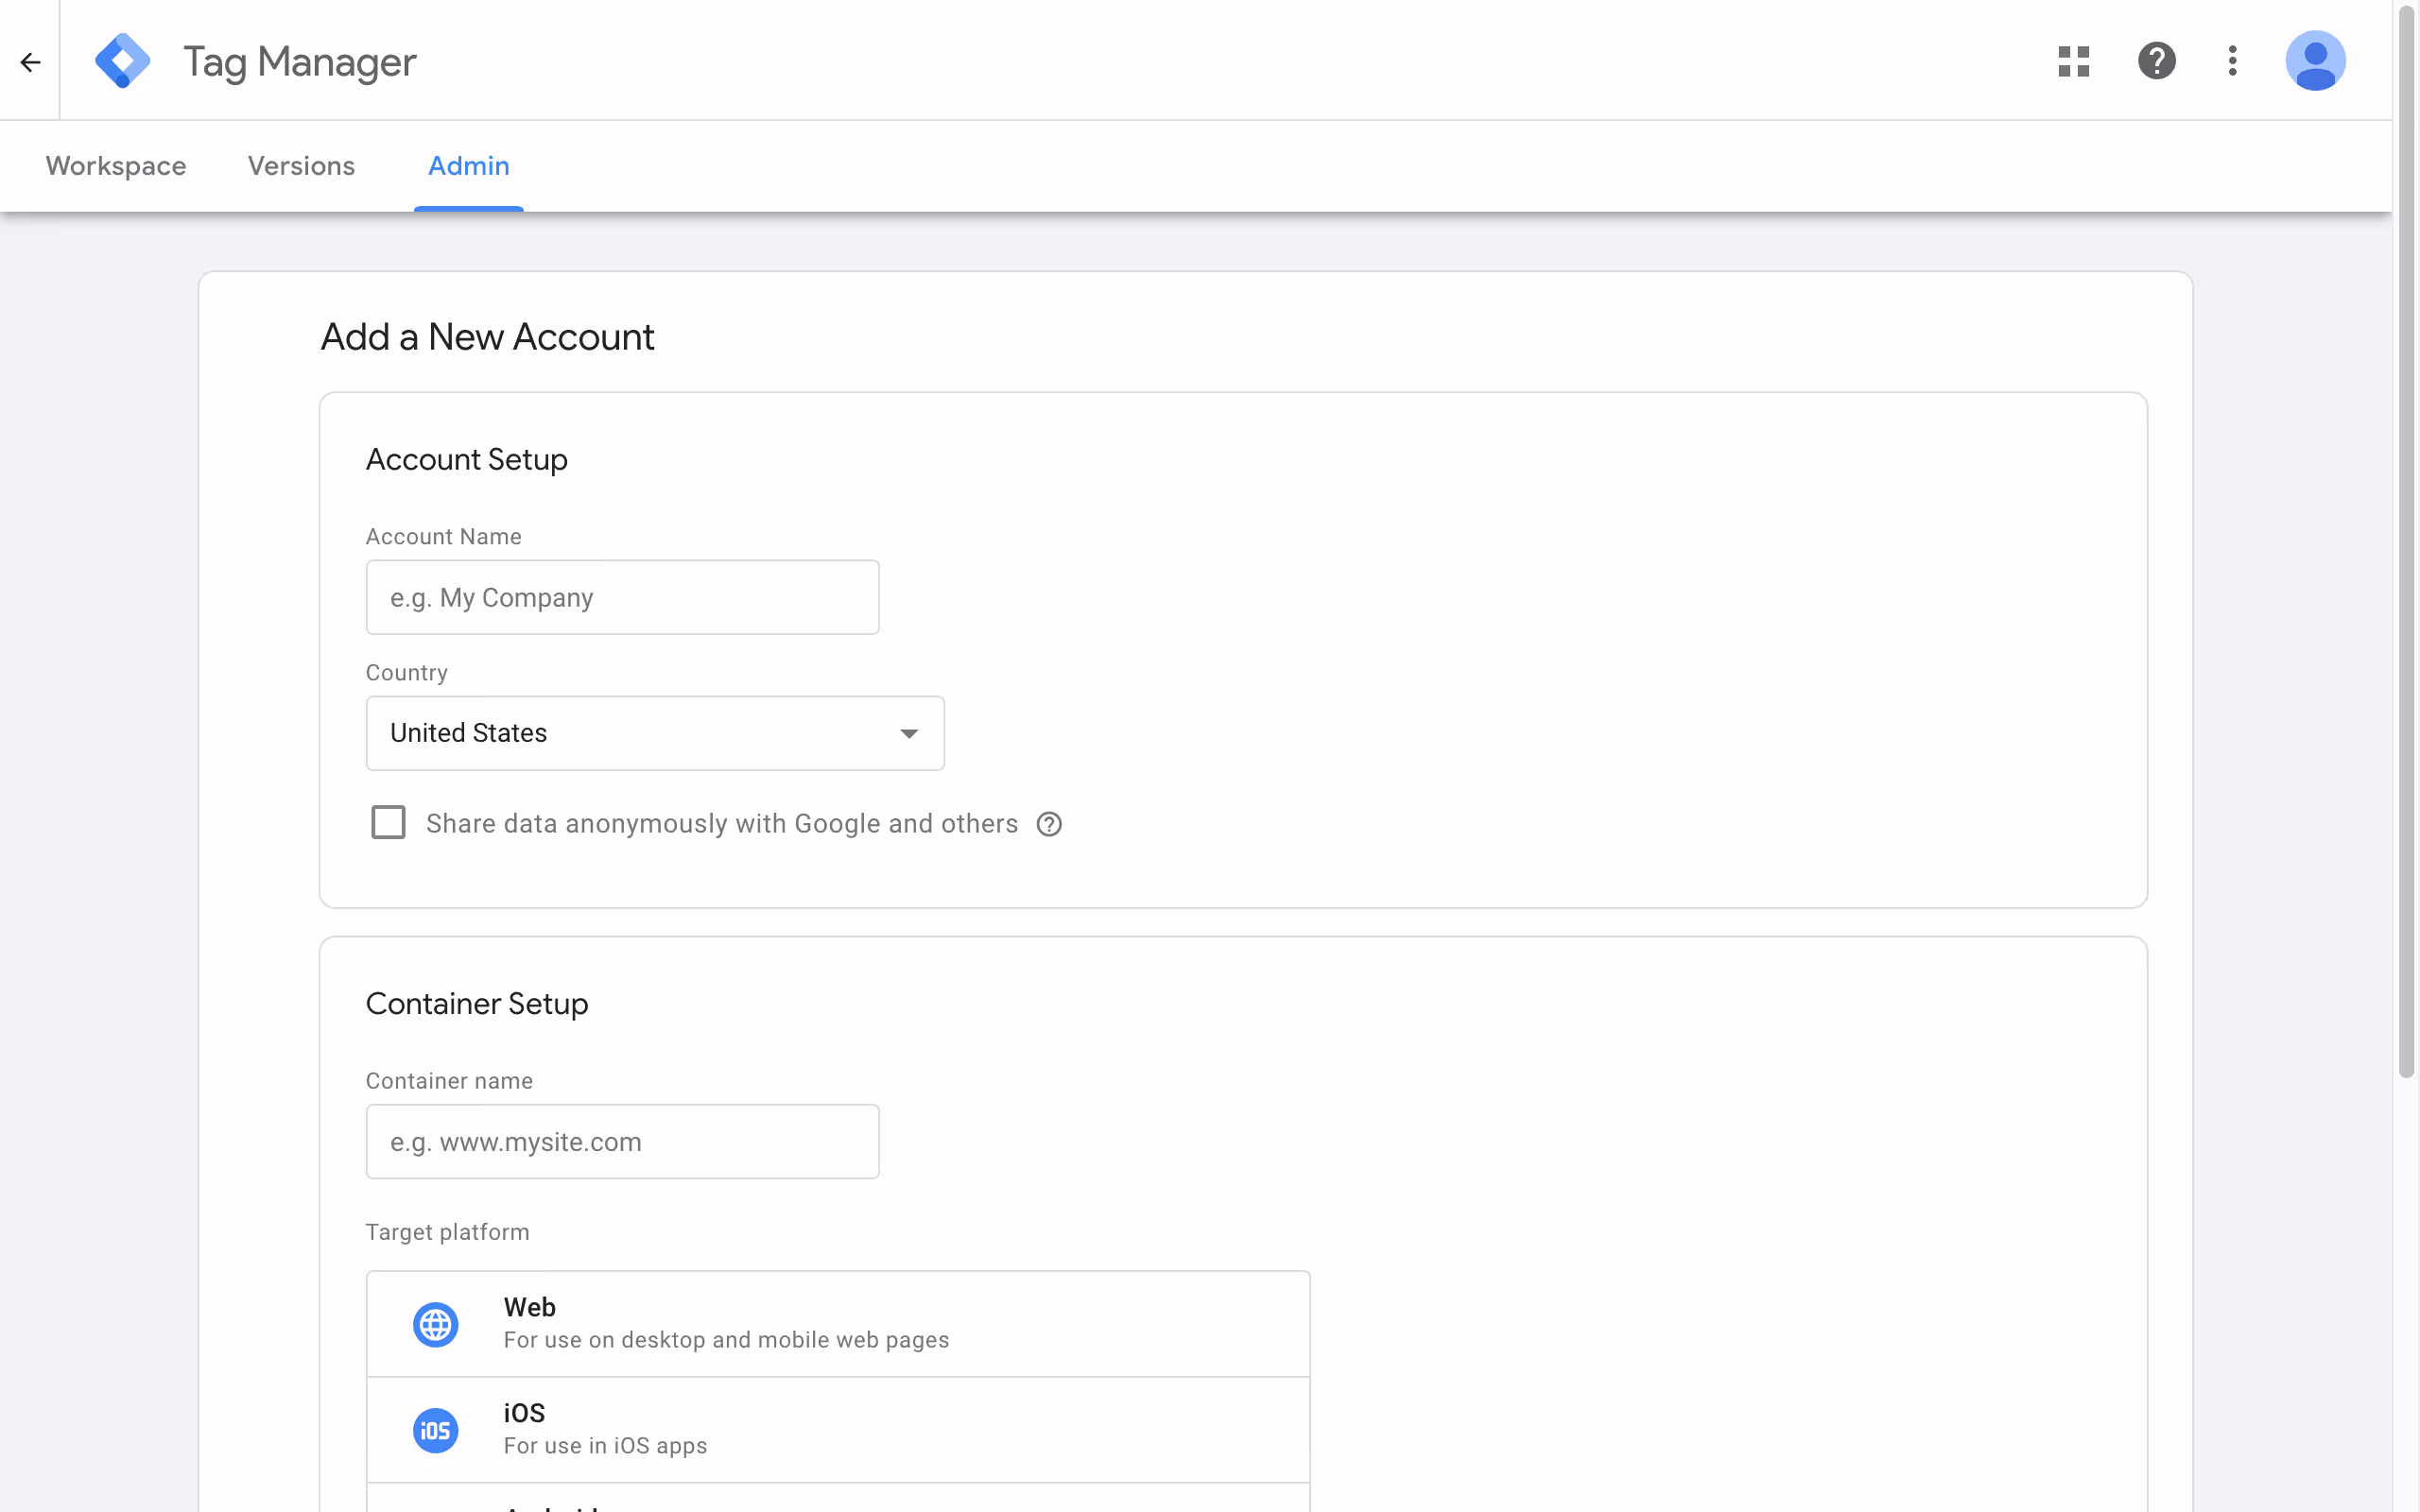
1. Create a GTM Account
- Go to Google Tag Manager.
- Sign in with your Google account and create a new account.
- Enter your account name, container name (your website), and choose the target platform (Web).
2. Add GTM Codes to Webflow
- Once your container is created, you’ll get two code snippets to add to your website.
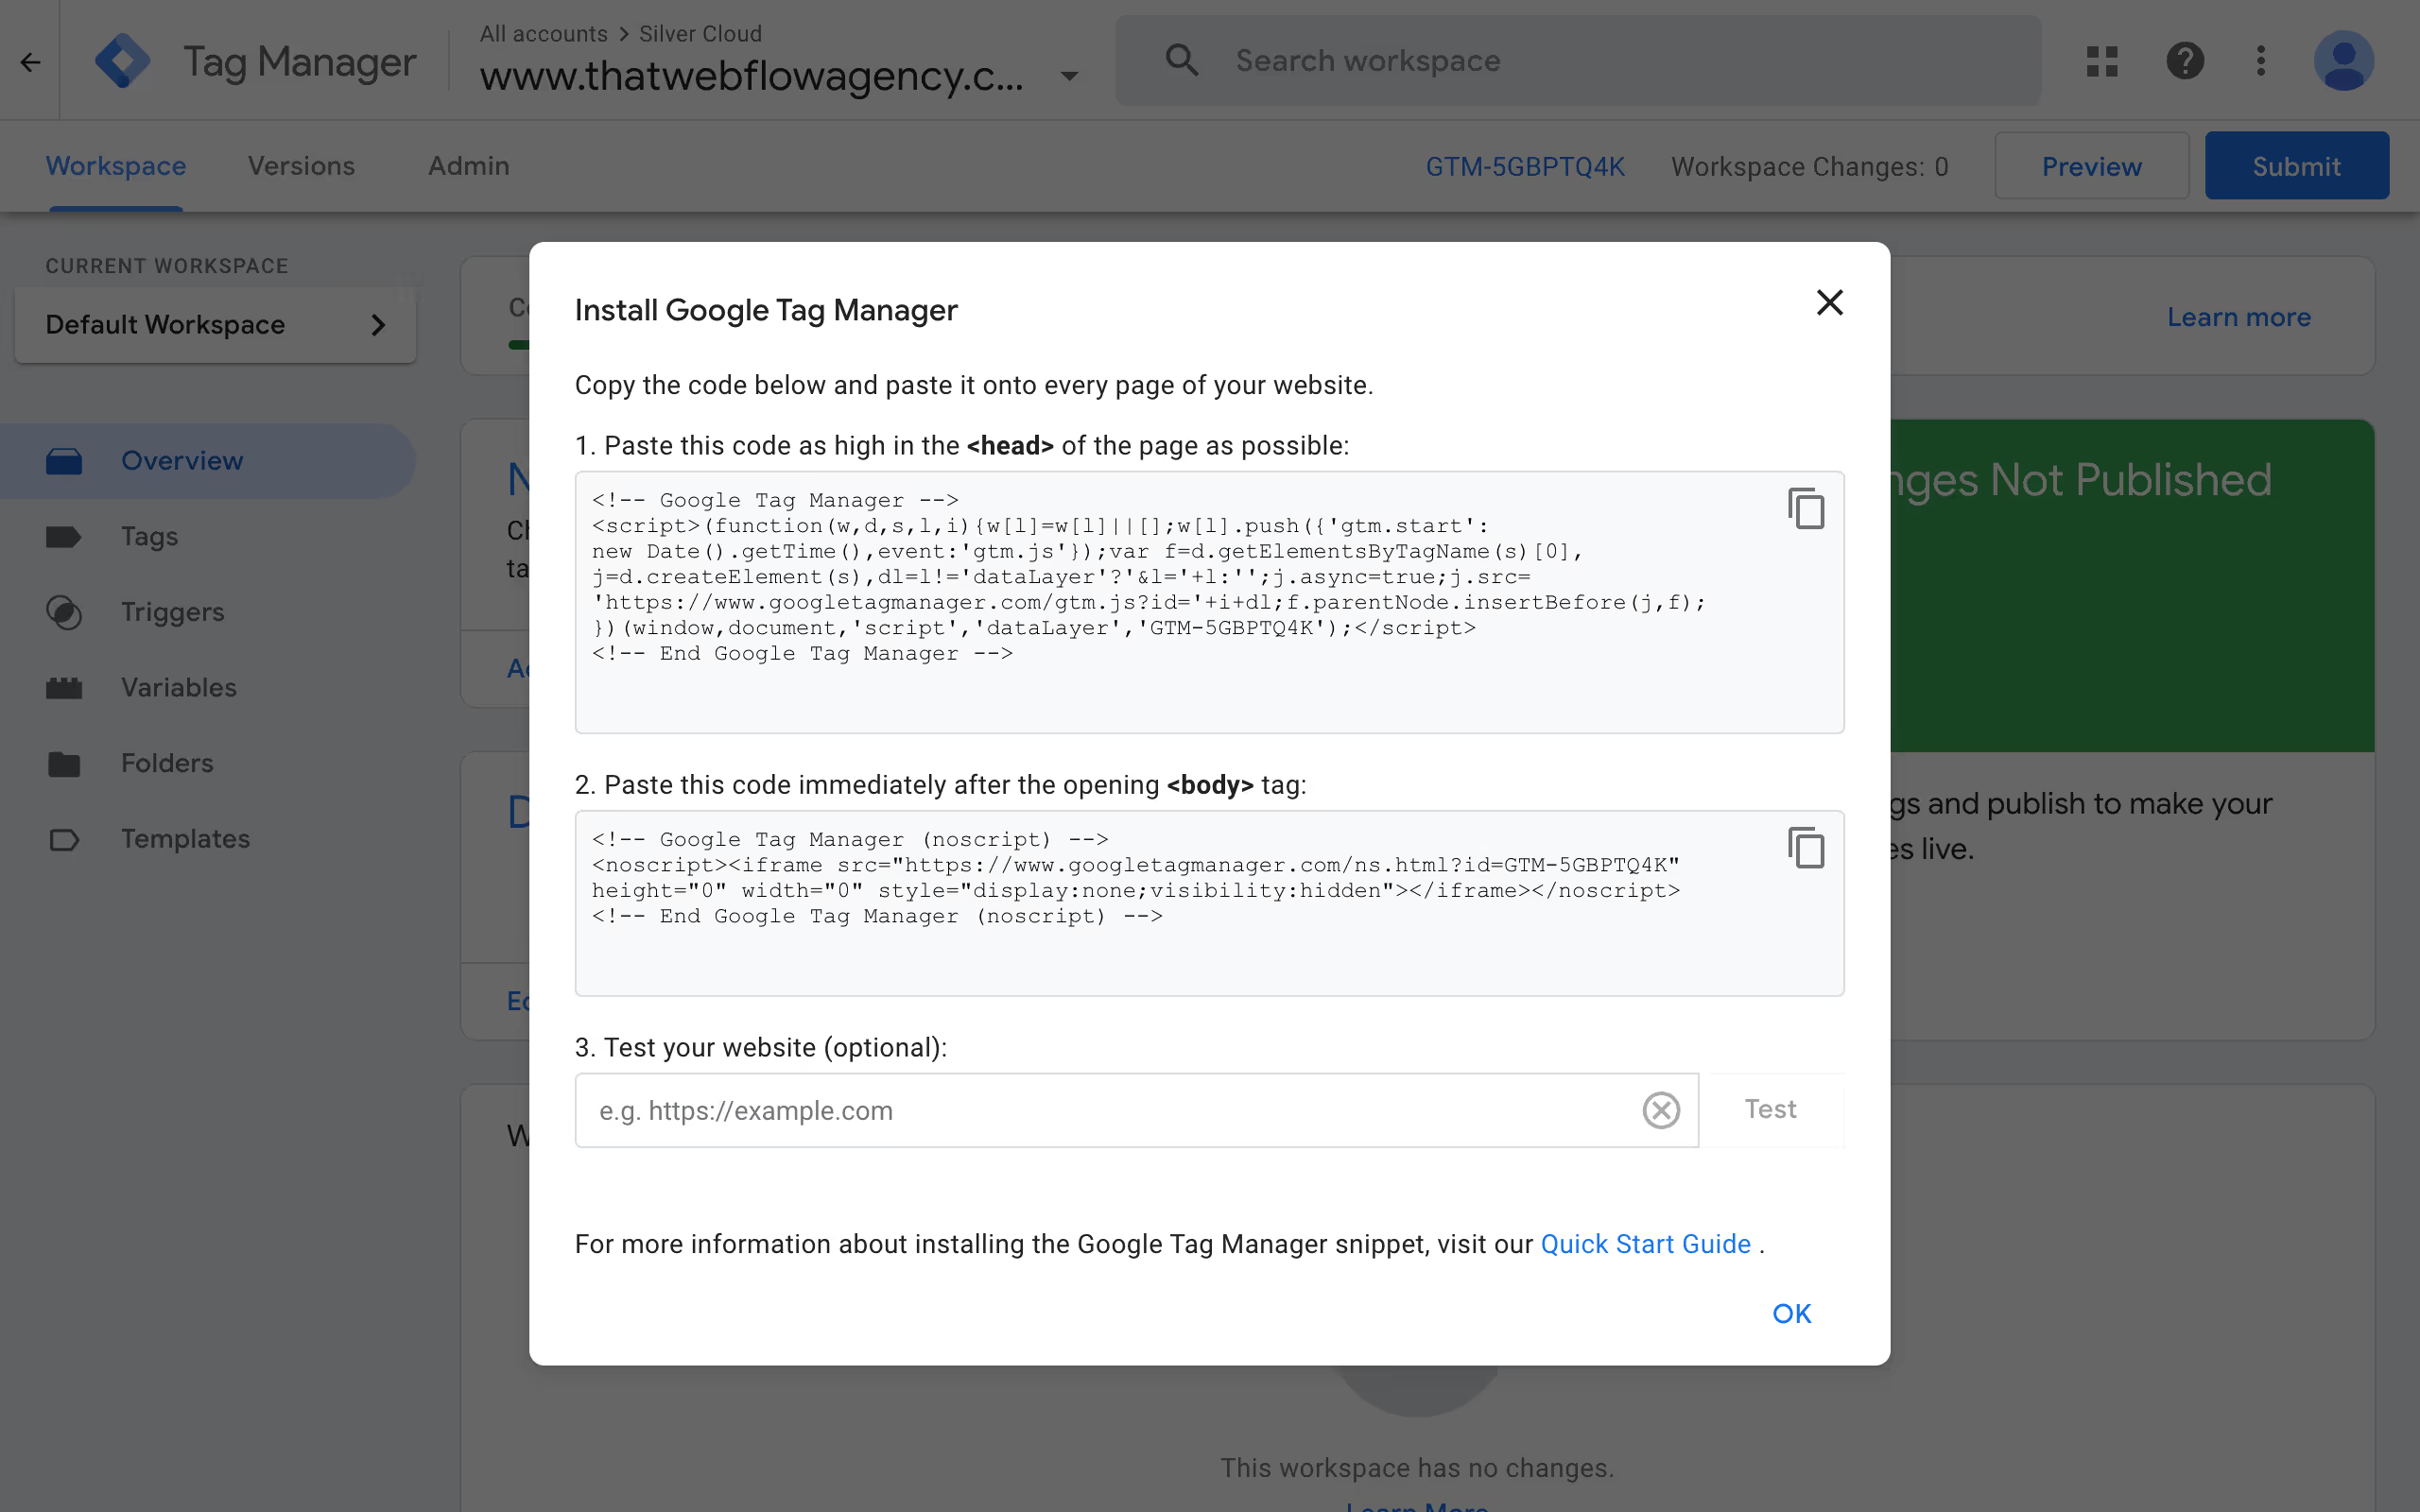
- In Webflow, go to Project Settings > Custom Code.
- Paste the first code snippet into the "Head Code" section, and the second code snippet into the "Footer Code" section.
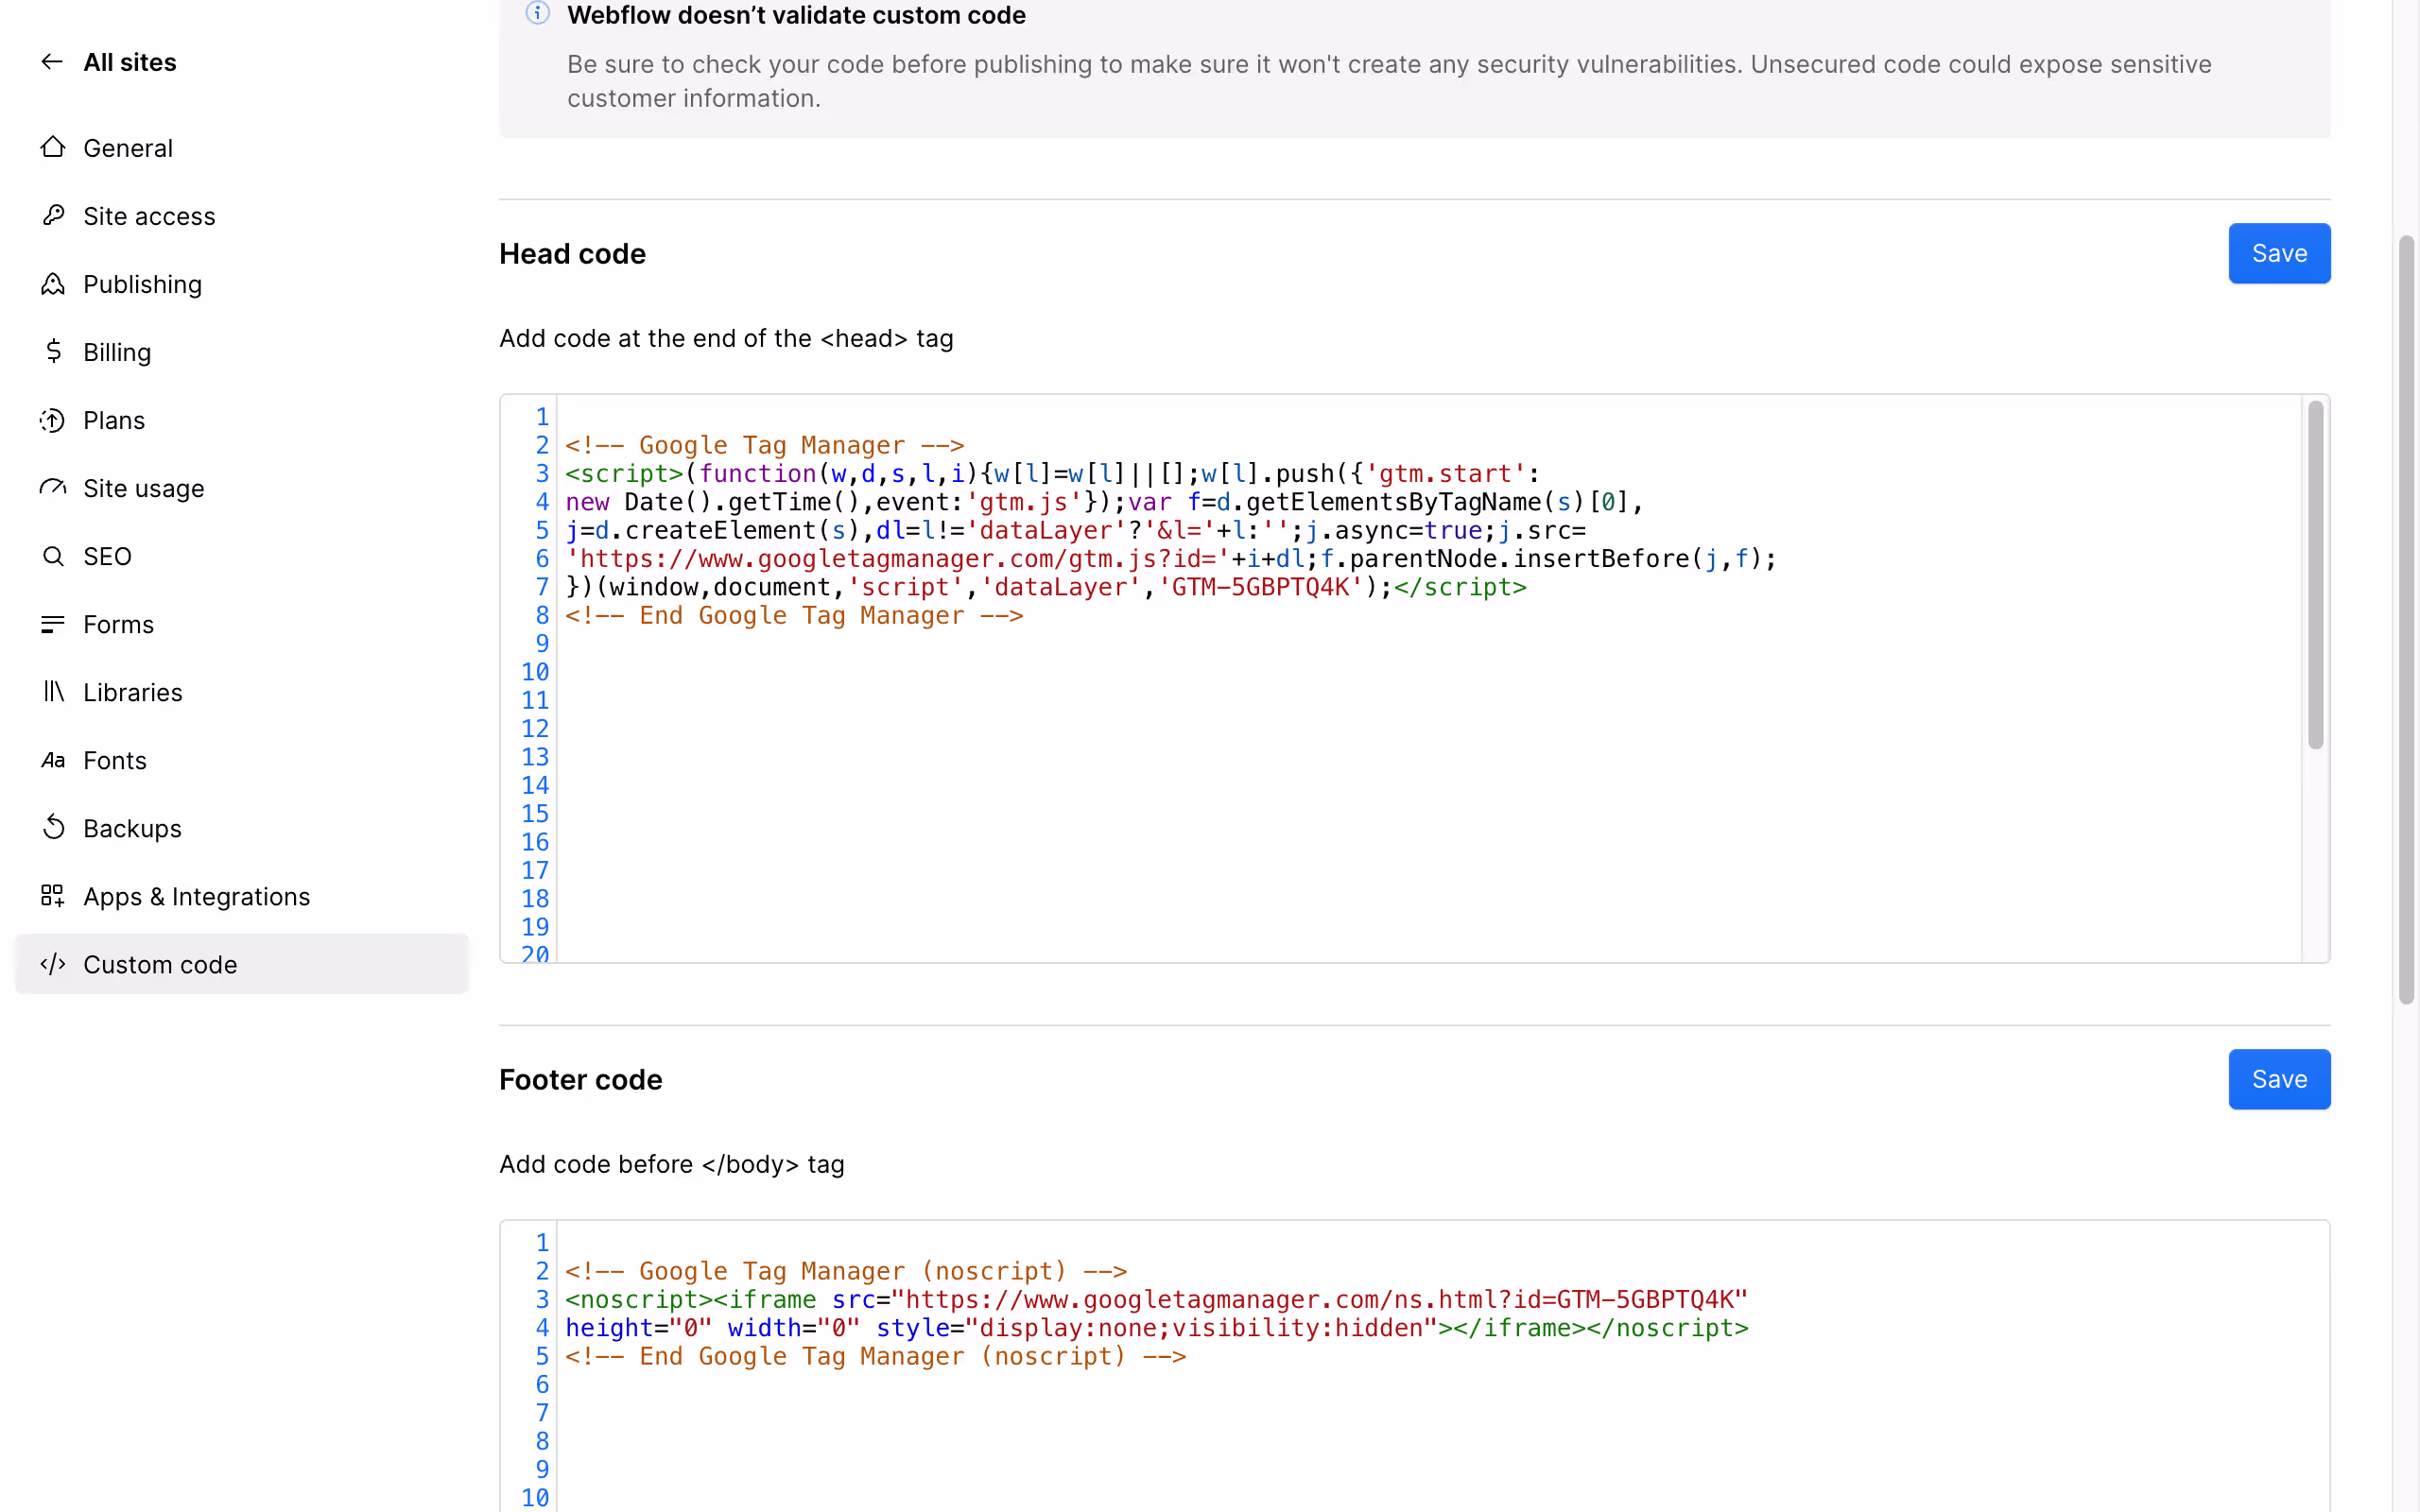
- Remove the Google Analytics code that you added before since the data will be set to Google Analytics via GTM now (more on setting that up later).
- Save changes and publish your site.
Now that GTM is installed on your website, the next step is to set up Google Analytics inside GTM.
Setting Up Google Analytics in GTM
1. Create a New Tag in GTM
- Go to your GTM account, click on "Tags," and then "New."
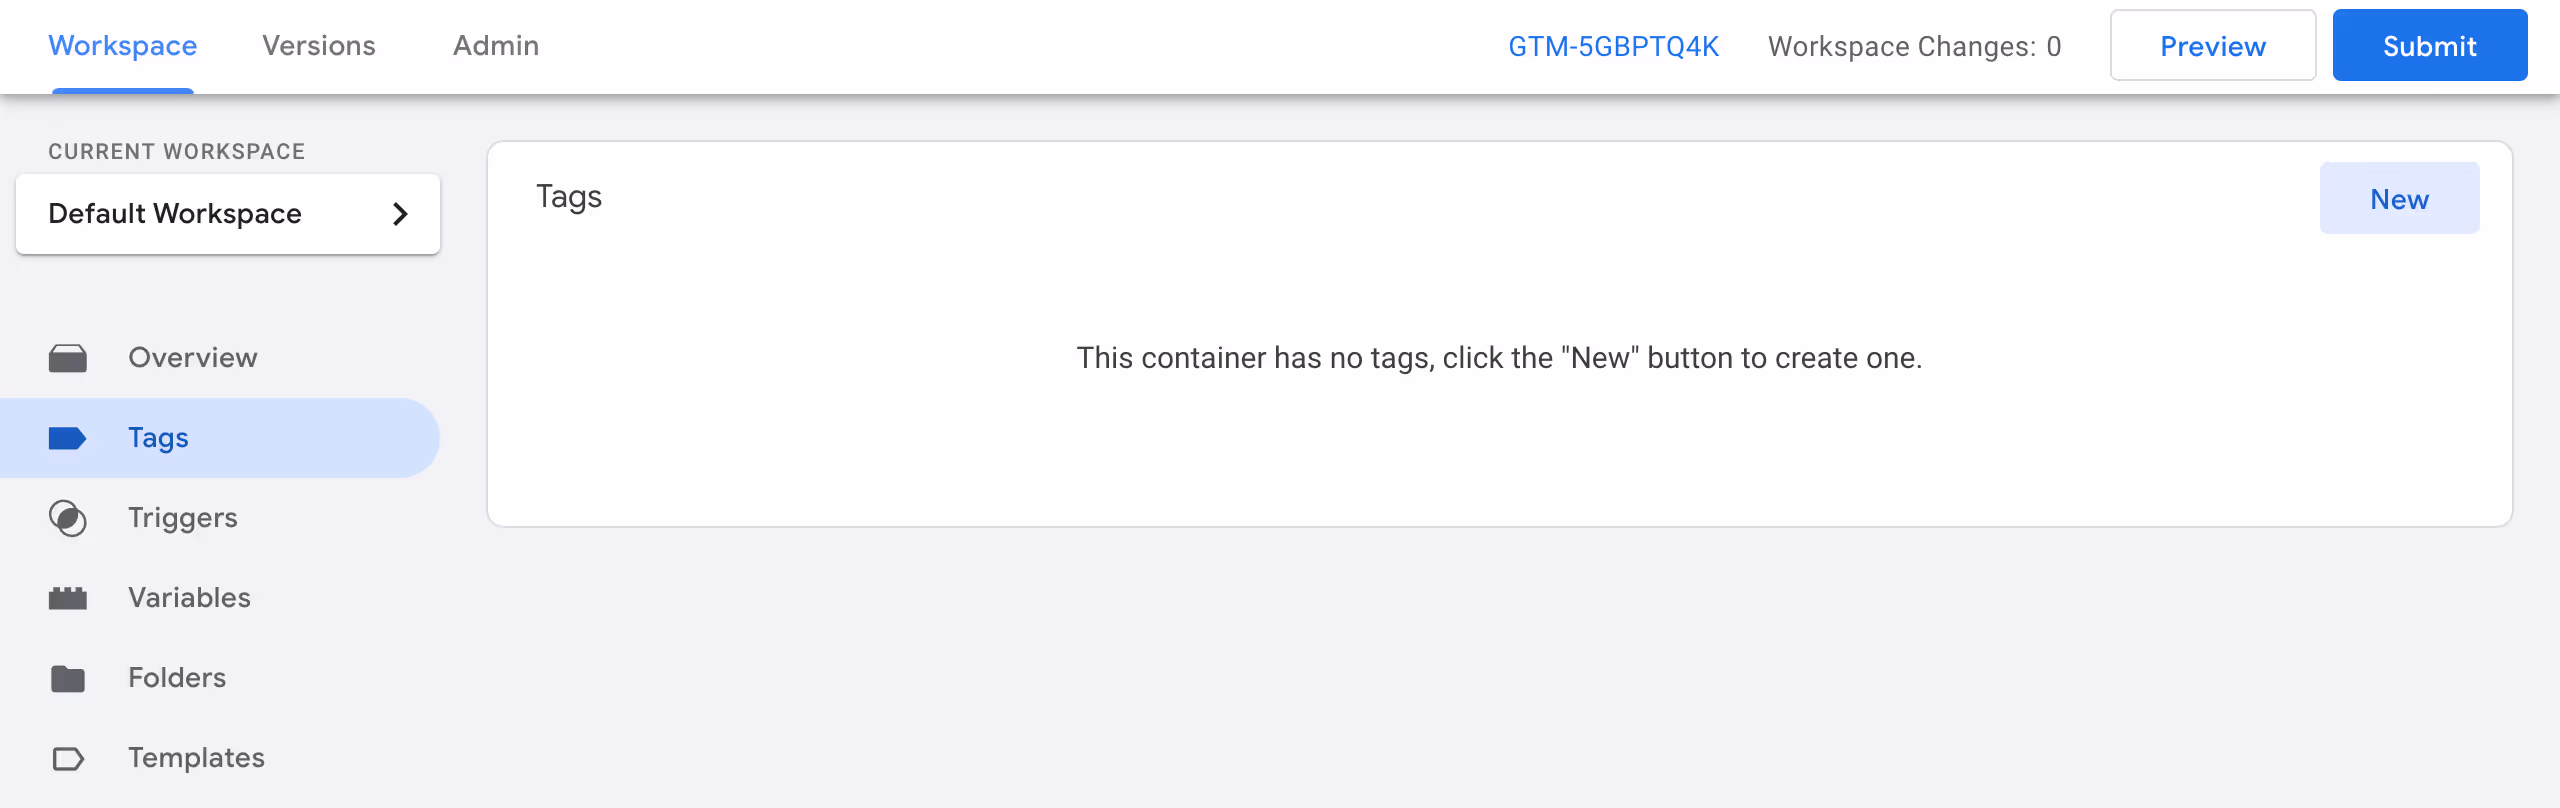
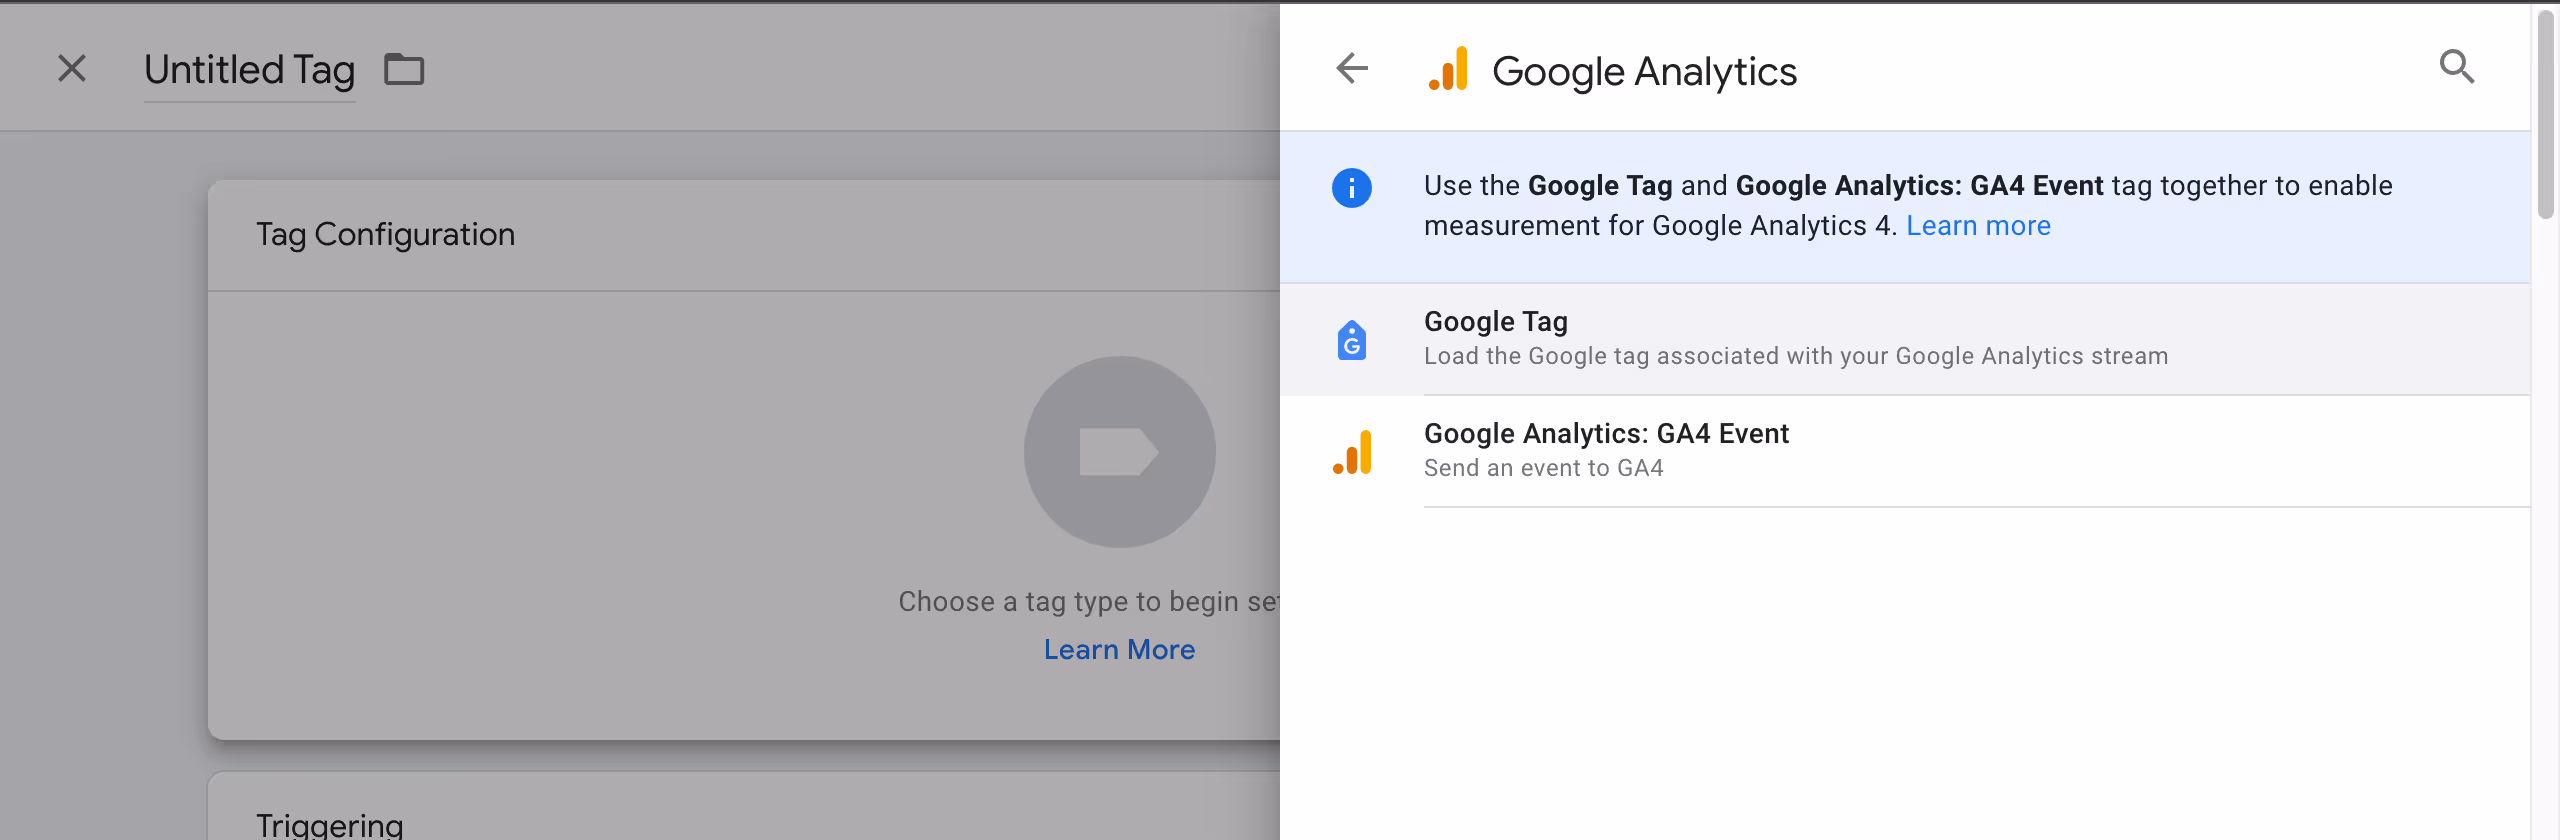
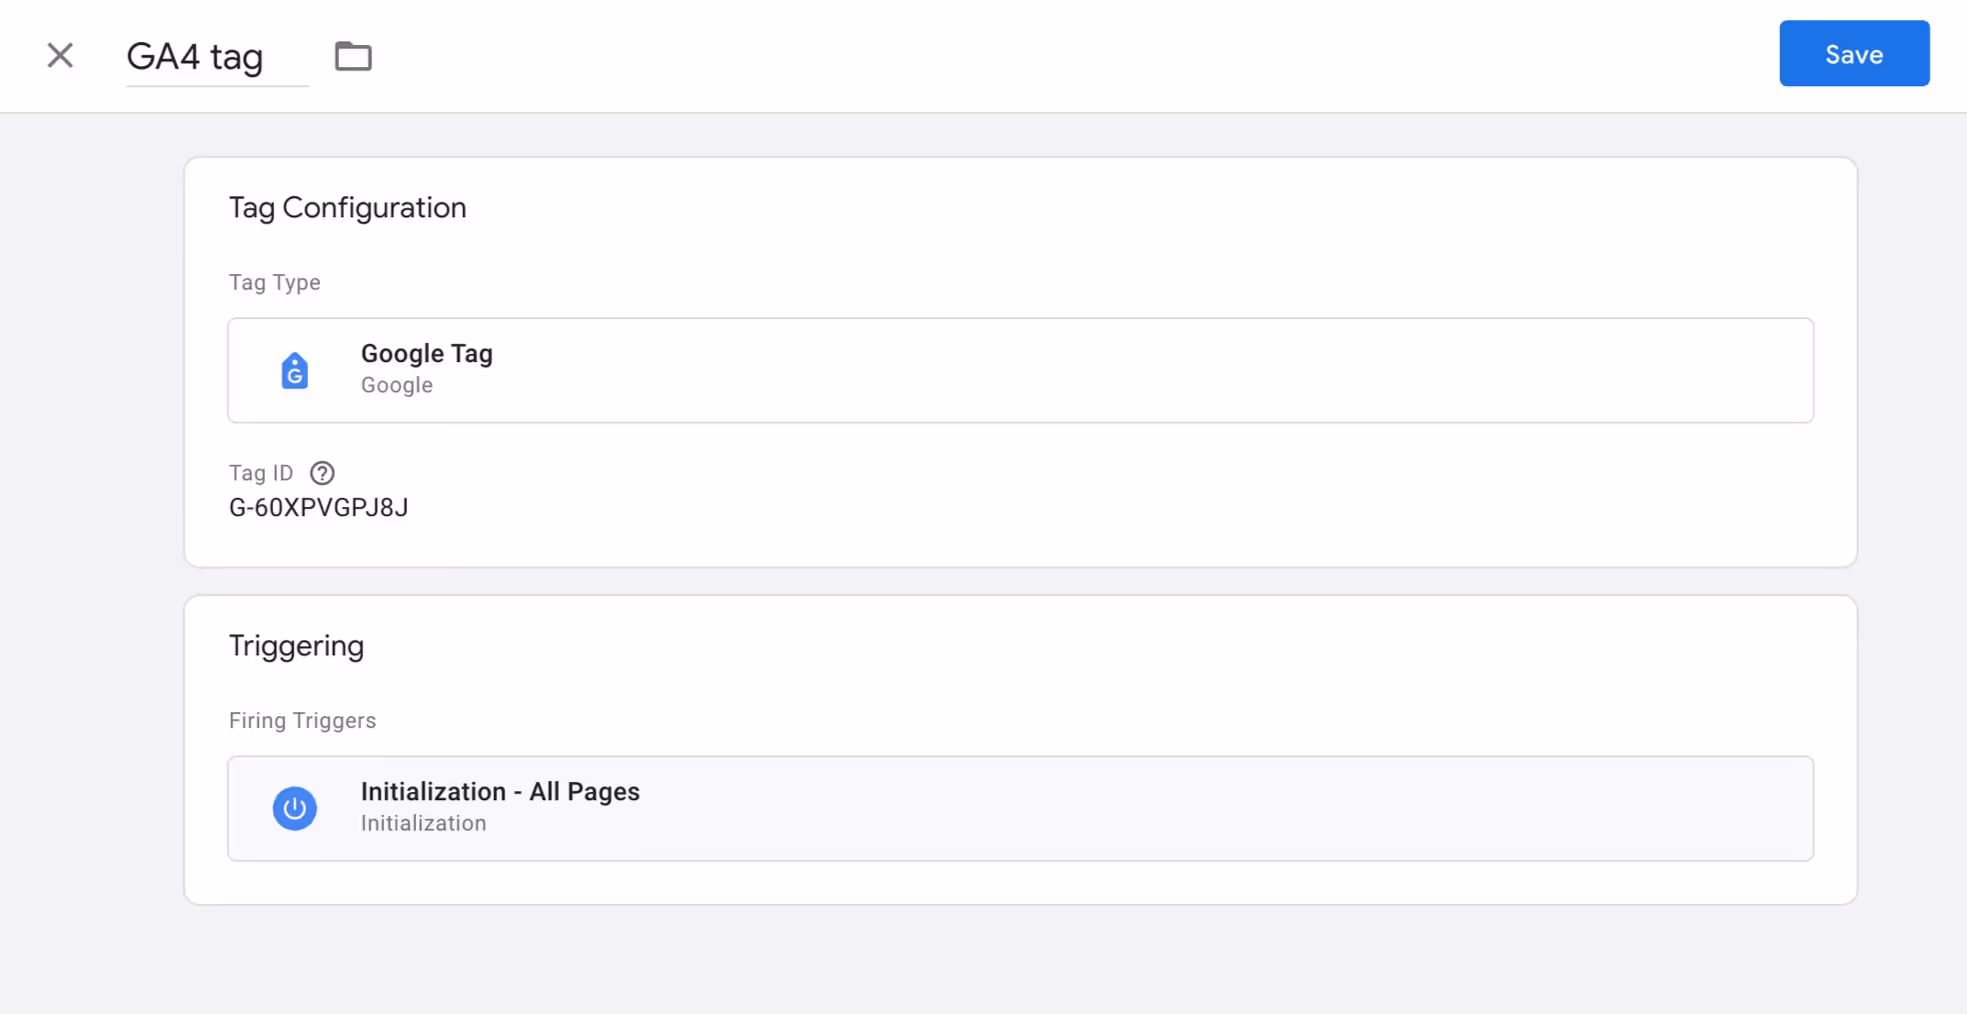
- Select "Google Tag" as the tag type.

- Enter your GA4 Measurement ID (e.g. G-60XJVLPJ3F) and set the trigger to ‘All pages’.
2. Save and Publish
- Save your tag configuration.
- Click on "Submit" in the top right corner to publish the changes.

Your Google Analytics should now be set, and it’ll start to get data through Google Tag Manager.
Setting Up Custom Event
Now that your GTM is set up, we can start setting up custom events that you might want to track. Let’s say you want to track button clicks on your website, to see which CTAs get you the most conversions. Here’s how you can do that -
1. Adding Click Variables in GTM
First things first, we need to add some click variables in Google Tag Manager (GTM). These variables will help us capture detailed information about the elements users interact with, such as which buttons they click on. By enabling these variables, we can set up more precise triggers and send richer data to Google Analytics.
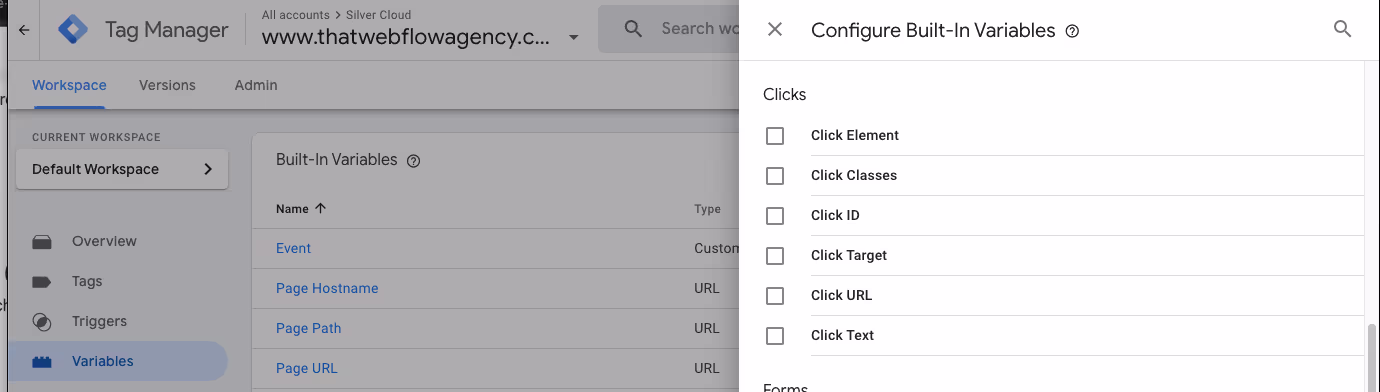
- In your GTM container, click on "Variables" on the left menu.
- Click on "Configure" under the "Built-In Variables" section.
- Scroll down to ‘Clicks’ and check all the boxes for the click variables:
2. Create a Button Click Trigger in GTM
Now, we’ll create a trigger for our button click. this trigger will determine when and where the tags should be executed on your website.
- In your GTM container, go to "Triggers" on the left menu.
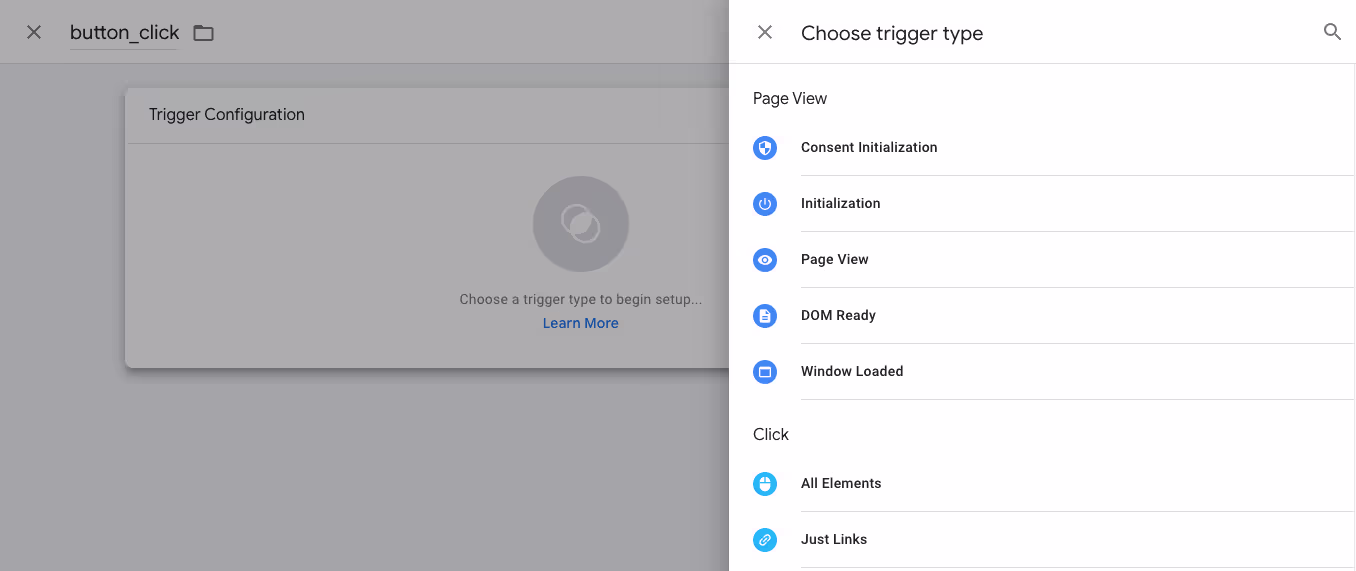
- Click on "New" to create a new trigger.
- Click on "Trigger Configuration" and select "Click - All Elements."
- Under "This trigger fires on," select "Some Clicks."
- Define the conditions for your trigger. For example, if you want to track clicks on buttons with a specific class, you can use a condition like
Click Classes contains your-button-class
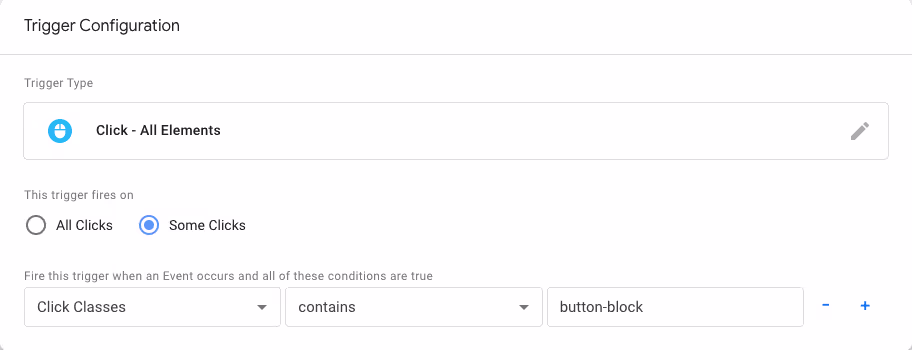
- You can also use other conditions like Click ID or Click Text depending on how your buttons are identified.
3. Create a GA4 Event Tag
We’ve set variable and trigger, now it’s time to create an event tag to track button clicks and send data to Google Analytics. Here’s how to do that -
- In your GTM container, go to "Tags."
- Click on "New" to create a new tag.
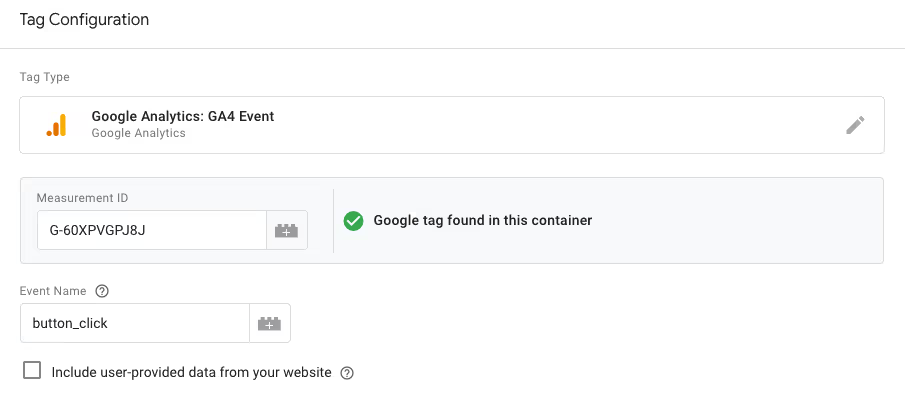
- Click on "Tag Configuration" and select "Google Analytics: GA4 Event."
- Enter your GA4 Measurement ID.
- Set the event name (e.g.,
button_click). - Add any additional parameters you want to track (optional).
4. Link the Trigger to the Tag
- Under "Triggering," click on the box and select the button click trigger you created in the previous step.
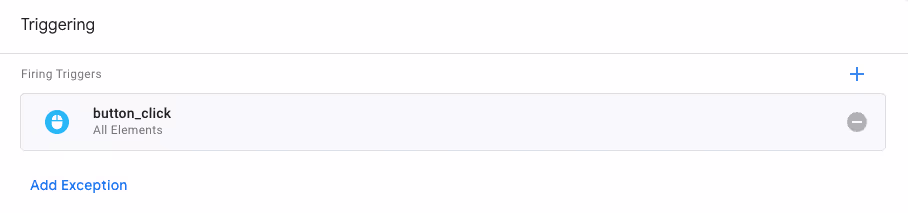
- Save your tag configuration.
5. Preview and Publish
- Use the "Preview" mode in GTM to test your setup.
- Click on buttons on your website to ensure the event fires correctly.
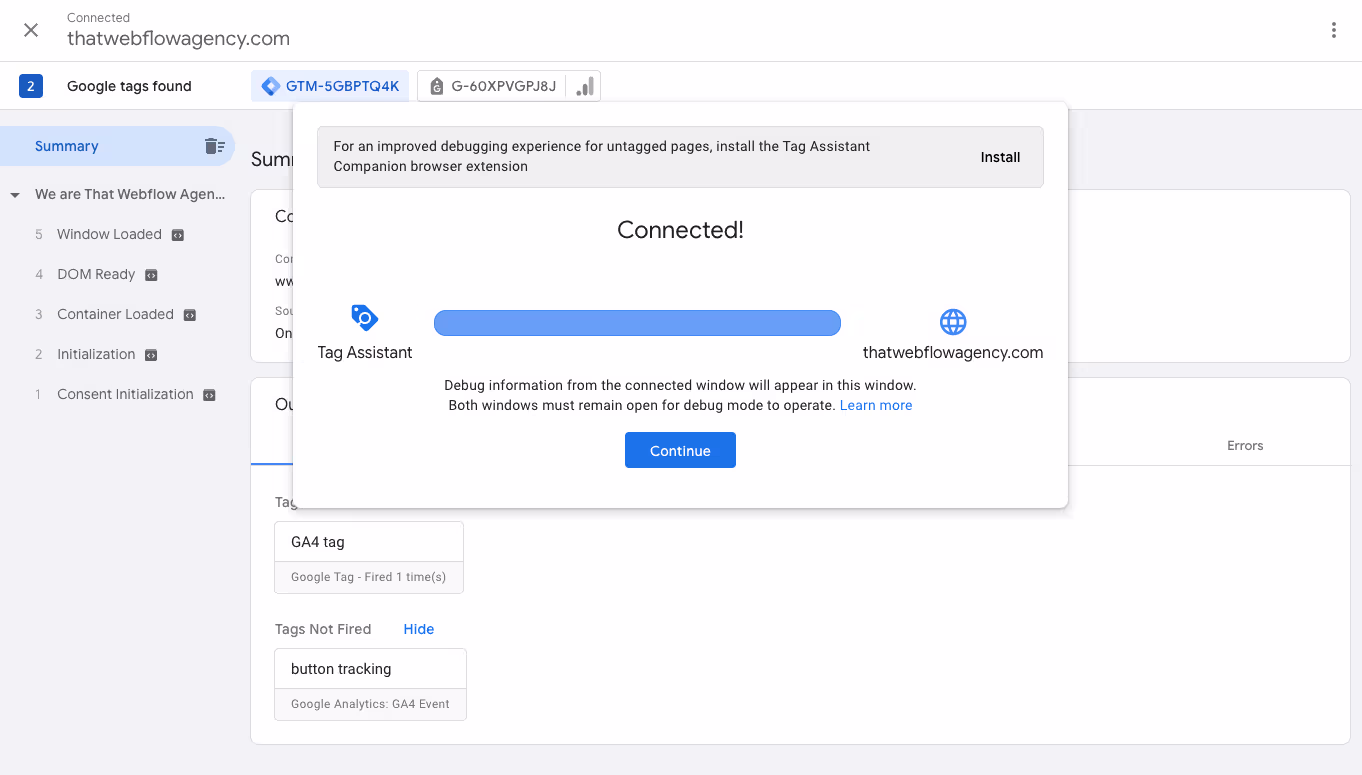
- Once you’ve confirmed the events are firing as expected, click "Submit" and publish your container changes.
You can set up other custom events like form submissions, add to carts, purchases etc similarly. Make sure to always test before pushing changes.
Best Practices for Using Google Analytics in Webflow
Following best practices ensures that you're getting accurate, actionable insights from your data. Here are some best practices that you should perform -
1. Define clear goals and KPIs
Establish specific, measurable goals that align with your business objectives to guide your analytics efforts. Set Key Performance Indicators (KPIs) to track progress towards these goals, such as conversion rates, session duration, or bounce rates. This clarity ensures your data analysis is focused and actionable.
2. Regularly monitor and analyze data
Consistently review your analytics data to identify trends and make informed decisions. Schedule monthly or quarterly reviews to stay updated on performance metrics, and utilize real-time reports for immediate insights on user activity, particularly following major updates or campaigns.
3. Segment Your Audience
Use audience segmentation to gain deeper insights into the behavior of different user groups. Analyzing segments such as new vs. returning visitors or mobile vs. desktop users helps tailor your strategies to meet diverse user needs effectively.
4. Optimize Based on Insights
Use data and insights you gather from Google Analytics to improve your website’s user experience. Regularly test and iterate on changes to see what works best for your audience.
6. Leverage Custom Reports and Dashboards
Customize your Google Analytics setup to see important metrics that matter to you. This will help you get quick access to relevant data, and keep a better track of your KPIs.
7. Ensure Data Accuracy
Regularly verify and validate your analytics setup to ensure the accuracy of your data. Use tools like Google Tag Manager’s debug mode and Google Analytics’ real-time reports to test and confirm that your tracking codes are implemented correctly.
Conclusion
Congratulations! By now, you should have a fully functioning Google Analytics setup on your Webflow site. You’ve learned how to set up and integrate Google Analytics, track key metrics, configure custom events, and implement best practices to make the most out of your data.
Don’t just set it and forget it. Make a habit of regularly checking your Google Analytics reports. This will help you stay on top of trends, understand your audience better, and continuously improve your website.


.avif)


.avif)