


About Stripe
Stripe is a payments platform that helps businesses accept and manage online payments. It supports everything from one-time purchases to subscriptions and donations, with a focus on speed, security, and flexibility.
It’s used by startups, SaaS companies, marketplaces, and enterprises around the world. Stripe handles payment processing, fraud prevention, and financial reporting — all behind the scenes — so you can focus on building your business.
If you're using Webflow and want to accept payments, Stripe is one of the most reliable ways to do it.
How to Integrate Stripe with Webflow
There’s no single way to connect Stripe with Webflow — the right method depends on what you’re trying to do. Below are the most common options, along with when to use each one and how to set them up.
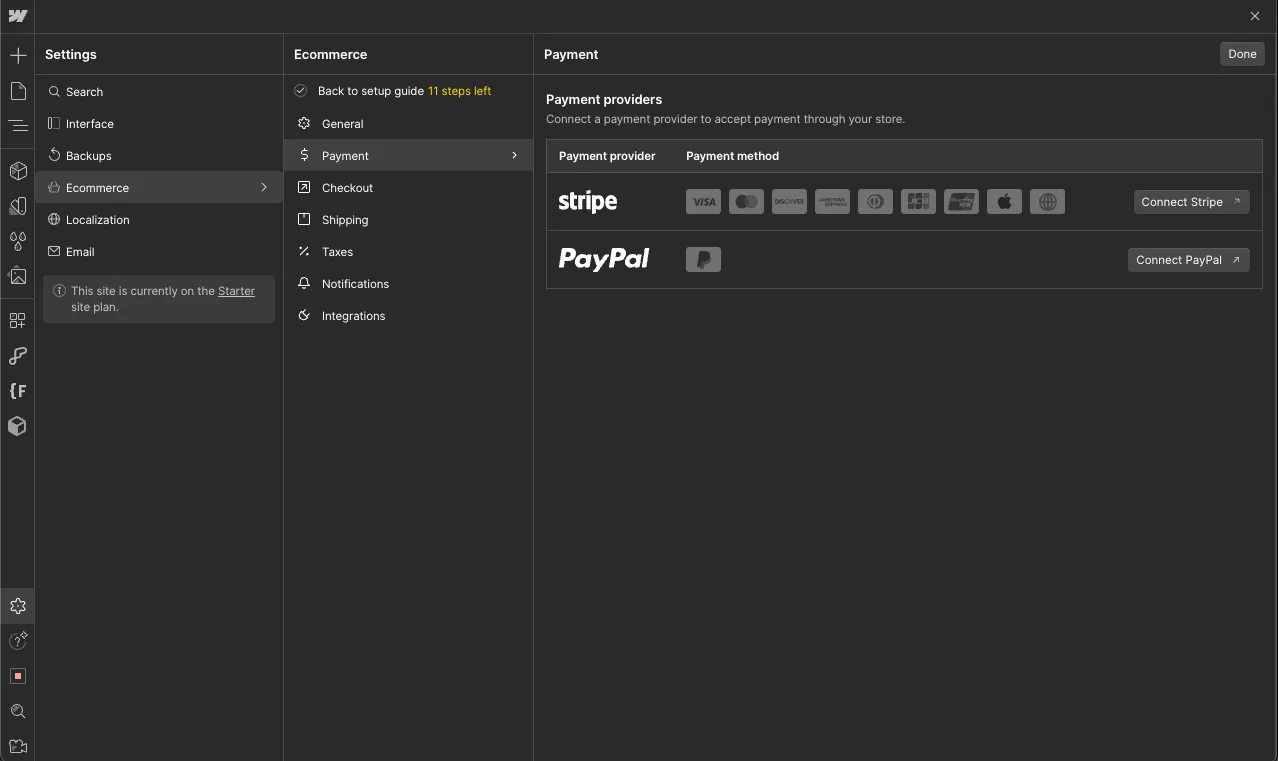
1. Use Webflow’s Built-In Ecommerce (Native Stripe Integration)
Webflow’s Ecommerce feature supports Stripe natively. This is the most straightforward option if you’re selling physical or digital products.
How it works:
- Enable e-commerce in your Webflow project
- Add products using the built-in CMS
- Style product pages, cart, and checkout using Webflow Designer
- Connect your Stripe account to handle payments
Best for:
People selling standard products or digital goods who want to manage everything inside Webflow.
2. Use Stripe Payment Links (Fast & Lightweight)
Stripe lets you create hosted payment pages for products, subscriptions, or donations — no coding required. You can drop these links into any Webflow page.
Best for:
Simple transactions, one-time payments, event tickets, or donation forms.
Setup steps:
1. Go to your Stripe Dashboard > Payment Links
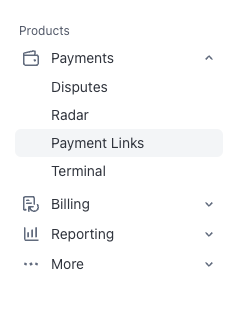
2. Click Create a Payment Link and choose a product or plan
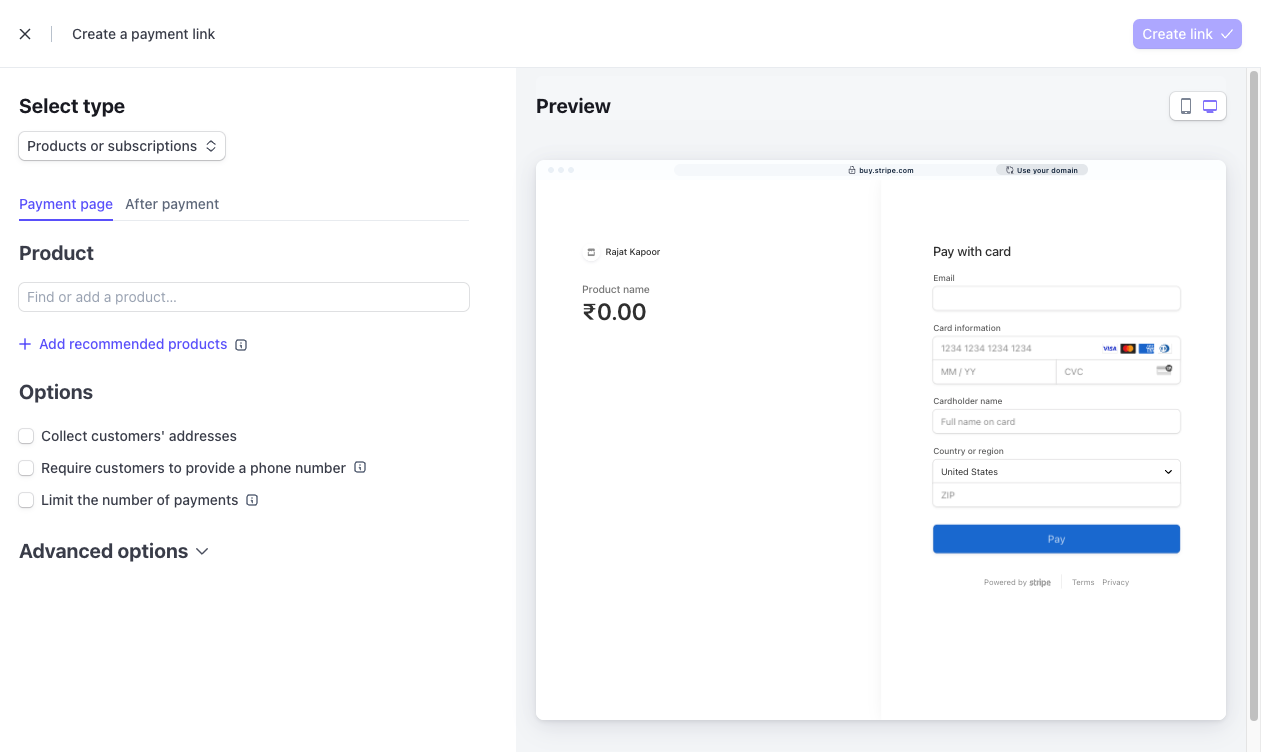
3. Customize the link settings
4. Copy the URL
5. In Webflow, add a button or link and paste the Stripe Payment Link as the destination
That’s it — clicking the button will take users to Stripe’s secure checkout page.
3. Use Stripe Checkout via Custom Code
Stripe Checkout is a pre-built, secure payment page you can launch with code. You can integrate it into Webflow using a little JavaScript and a backend function.
Best for:
Custom payment flows or branded experiences, especially when using Zapier, Memberstack, or custom code stacks.
Setup overview:
- Requires a backend to generate Stripe Checkout Sessions
- Add JavaScript to trigger the redirect to Stripe
- You host the product content in Webflow and use Stripe for the checkout only
Note: This setup is more advanced and requires dev knowledge or third-party support.
4. Use Memberstack + Stripe (for Subscriptions or Gated Content)
Memberstack integrates with Stripe and Webflow to power membership sites and gated content. It handles login/signup, connects to Stripe for payments, and restricts content inside Webflow.
Best for:
Subscription products, gated content, online courses, or SaaS-style sites.
Setup steps:
1. Sign up for Memberstack and connect it to your Webflow project
2. Connect Memberstack to your Stripe account
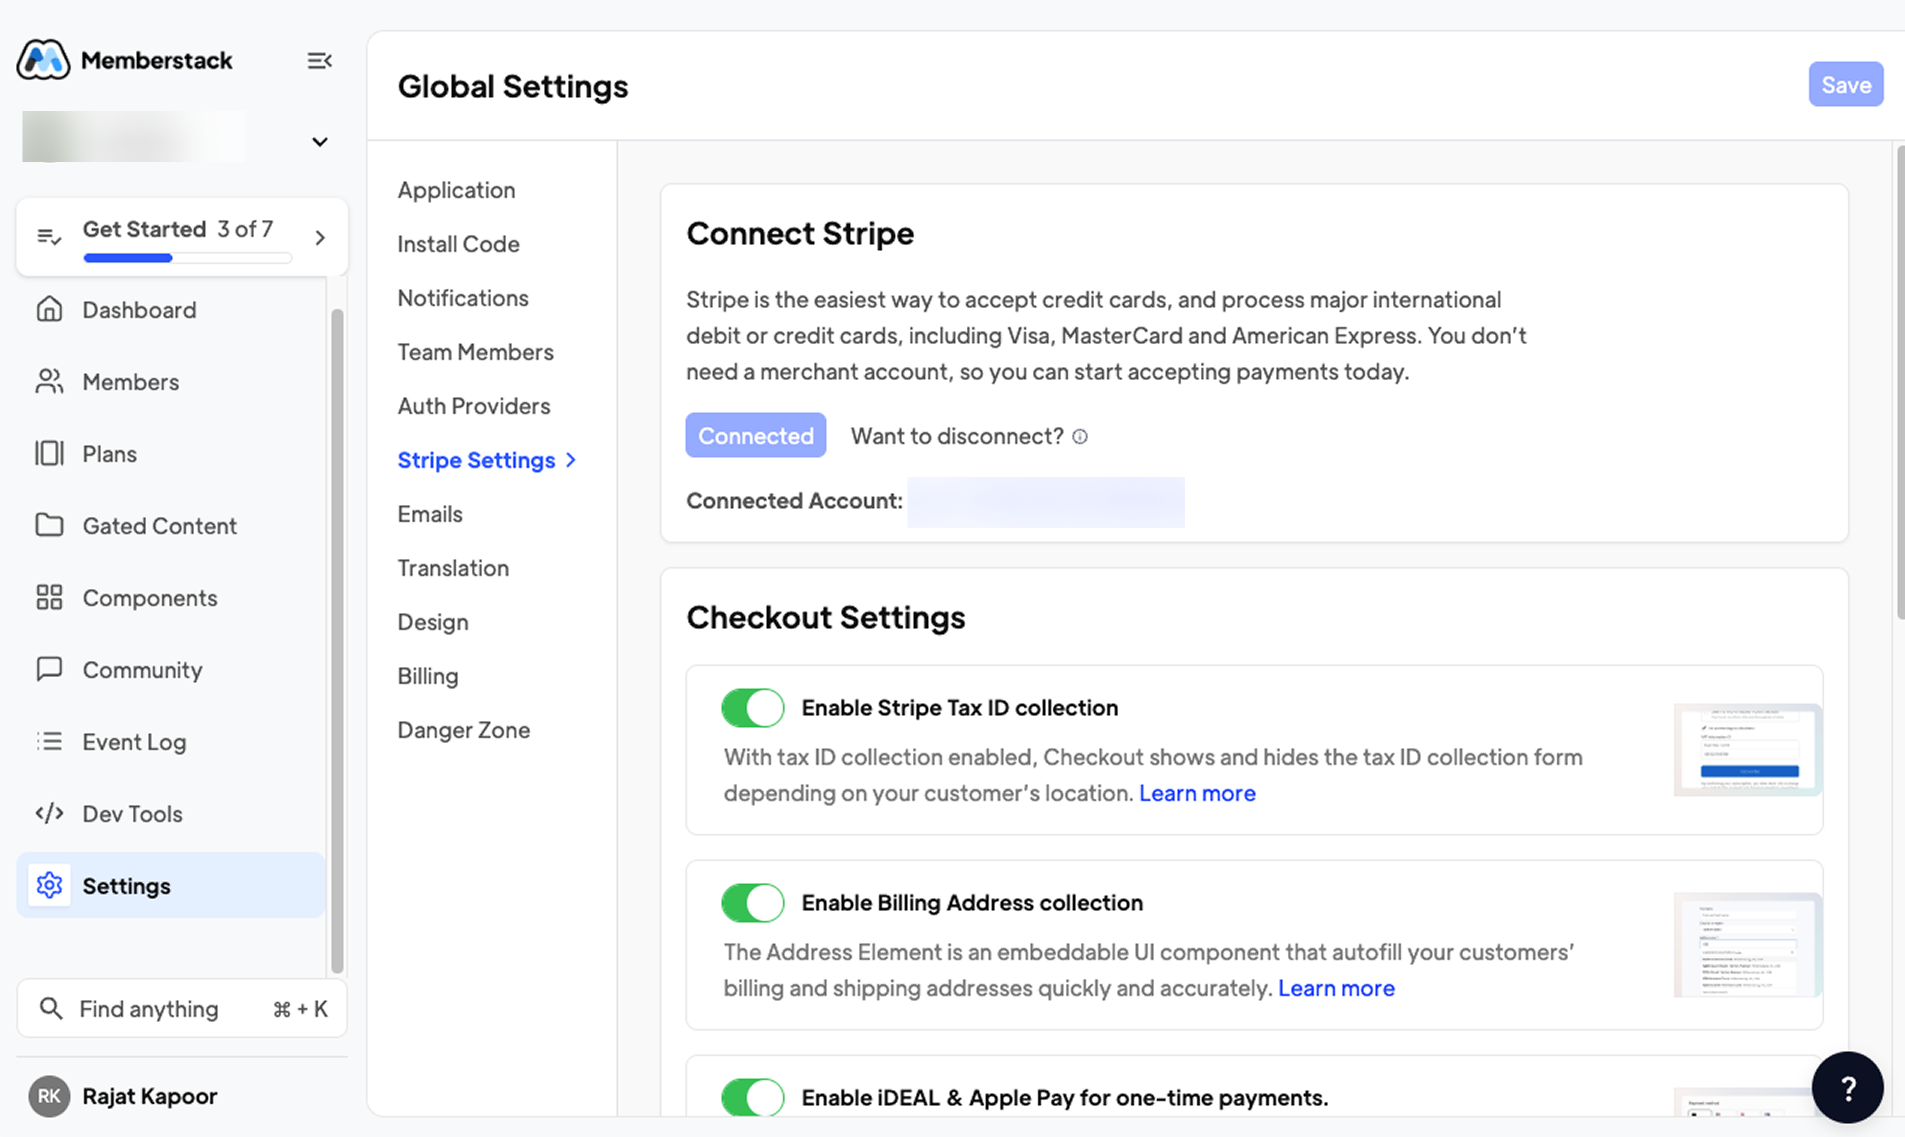
3. Create plans in Memberstack (which auto-generate Stripe products)
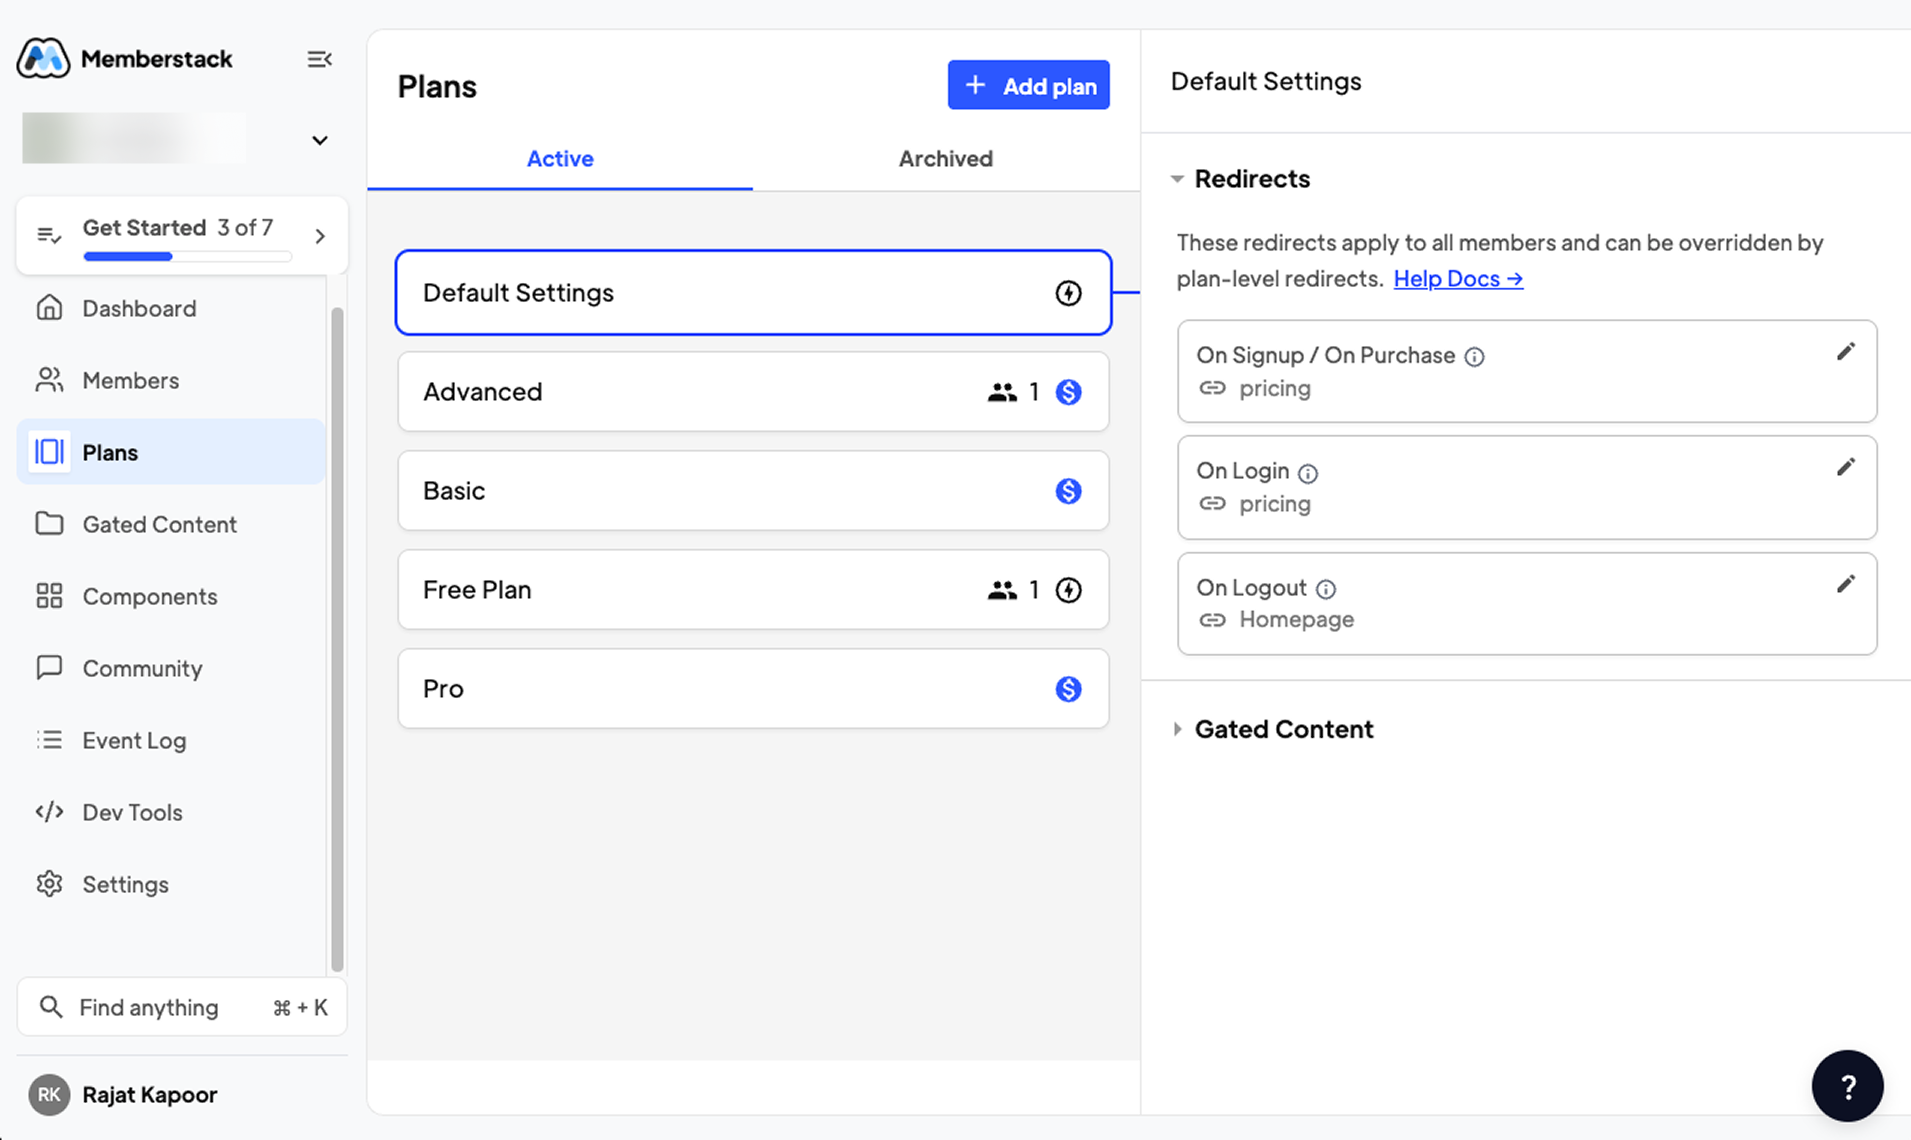
4. Add login/signup buttons in Webflow using Memberstack’s embed script
5. Set up protected pages or sections using Memberstack’s UI
You manage content in Webflow, while Stripe handles billing in the background.
Common Challenges When Connecting Stripe to Webflow
While Stripe is powerful and Webflow gives you design freedom, combining the two can get tricky depending on how you want things to work. Here are some common issues people run into:
1. Confusion Around Integration Methods
There’s no single “Stripe integration” button in Webflow. Between Payment Links, Ecommerce, Memberstack, and custom code — it’s easy to get stuck figuring out which approach fits your use case.
2. Styling Limitations with Embedded Elements
Stripe-hosted elements like the Buy Button or Payment Link pages don’t always match your Webflow design. Customizing their look and feel requires extra work — or third-party tools.
3. Checkout Flow Is Off-Site (In Most Cases)
Unless you build a fully custom checkout, users are usually redirected away from your Webflow site to complete payment — which might not be ideal for every brand.
4. Managing Subscriptions Is Complex
If you're using Stripe for subscriptions, you’ll need to handle logic for signups, plan changes, cancellations, and user access — which isn’t built into Webflow by default.
5. Custom Setup Needs Dev Support
Using Stripe Checkout or Stripe Elements requires backend configuration and secure API handling. If you're not comfortable with that, it can be a blocker.
Which Method Should You Choose?
If you’re unsure where to start, here’s a quick breakdown to help you pick the right approach based on what you’re trying to do:
How Amply helps with Webflow-Stripe Integration
Stripe is powerful — but setting it up the right way in Webflow depends on what you’re trying to achieve. We help you choose the best method for your use case and make sure everything works smoothly, both on the frontend and behind the scenes.
Whether you're accepting payments, running subscriptions, or building a custom checkout experience, we make sure it’s fast, secure, and reliable — without breaking your site design or your head.
Here’s what we help with:
- Choosing the right integration method for your site
- Setting up Stripe inside Webflow Ecommerce
- Embedding and styling Stripe Payment Links
- Connecting Memberstack and Stripe for subscriptions or gated content
- Implementing custom Stripe Checkout flows
- Troubleshooting payment errors or broken workflows
- Making sure payments, data, and user journeys work exactly as expected
Need help setting it up or want to skip the tech altogether? Book a Free Call

.svg)


.avif)


.avif)


.svg)


.avif)
.avif)


.avif)
.avif)


